Posted on 12 Comments

June 2020 Release | Debut Day 3

We are at Debut Day 3 now. I hope that you have enjoyed the showcase the last couple of days. Tomorrow we will debut our last two sets and it will also be our Release day. Woot woot!

The two sets we are showcasing today coordinates with each other very well. They will also coordinate with our Narwhal set which we showcased on Debut Day 1.

First up on our line up today is Under The Sea: Background

Available for purchase on June 12, 2020
4×6 stamp set
Retails for $16.00
Includes five (5) stamps – one (1) large image + four (4) words/sentiments

The second set on our line up today is Under The Sea: MerFriends

Available for purchase on June 12, 2020
4×6 stamp set
Retails for $16.00
Includes twenty-one (21) stamps – fourteen (14) images + seven (7) words/sentiments

And now let’s see the stamps in action!

To showcase our Under the Sea: Background set, I decided to make another pop-up card (I made one yesterday using our Take a Leap of Faith set, click HERE to see it). I also used my homemade waves stencil to create the waves on this card. Using my trusty distress inks, I blended various shades of blues to achieve the desired backdrop. I will write a separate post on all the supplies and my process creating this card if you are interested to know more. Just let me know in the comments below.

I used the narwhals from our Under the Sea: Narwhal set which we showcased on Debut Day 1 (click HERE to see more) to complement this large stamp. The little fishes are from Under the Sea: Merfriends which we are showcasing today too. These 3 sets complement each other so very well and are so fun to play around with.

I stamped all the images on smooth cardstock as I am using my colored pencils to color all the images. Then I fussy cut them while watching some of my favorite re-runs. To assemble this pop-up card, I used a recycled piece of stiff acetate to pop the narwhal up so that it looks dimensional. Then, I added little white bubbles using my white gel pen. It adds just that little dimension to complete the scene.

For this second card, I used Under The Sea: Merfriends set. First, I stamped all the images onto the cardstock, then using a masking fluid pen, I covered the images with the masking fluid. This allows me to apply watercolor onto the cardstock without coloring the images. Allow the masking fluid to dry before applying watercolor onto the images.

To create a flat card, I applied watercolor directly on white cardstock. Another reason why I applied watercolor directly on the cardbase and not on watercolor paper is because I rather like the speckled, uneven look of watercolor on cardstock. Because cardstock is not made for watercoloring, the watercolors are being absorbed very quickly into the paper. This makes it really hard to create a smooth wash but that is the look that I am going for. Once the watercolor is dried, I peeled off the masking fluid with an eraser.

Next, I colored the images with colored pencils and darken the lines with a ballpoint pen because peeling the masking fluid off with an eraser did lighten the ink a little. I finished off the card with some waves stamp from Under the Sea: Narwhal and clear crystals I got a long time ago.

INSPIRATION FROM THE DESIGN TEAM

Amy Tsuruta

CLICK HERE to see more from Amy

Annette Allen

CLICK HERE to see more from Annette

Emily Leiphart

CLICK HERE to see more from Emily

Heather Hoffman

CLICK HERE to see more from Heather

Patricia Roebuck

CLICK HERE to see more from Patricia

I hope you have enjoyed today’s showcase and are loving all the inspiration from our Designers as much as I do. Tomorrow is our Release day with the showcase of our last two stamp sets from this Release.

Remember to check back here to see the final two sets and also our Giveaway. We will be giving away not one but two prizes this Release!

Keep Crafting and Smile Always,
Evelin

Posted on 16 Comments

June 2020 Release | Debut Day 2

Debut Day 2 and today we are showcasing another two new sets. I hope that you have had a chance to check out our Sneak Peek Video and the first two sets that we are releasing this Friday. If you have not had the chance yet, just click HERE for the Sneak Peek Video and HERE for details on Debut Day 1. Or you can just scroll down 🙂

The first stamp set that we are showcasing today is Positivi-Tea

Available for purchase on June 12, 2020
4×6 stamp set
Retails for $16.00
Includes fourteen (14) stamps – eight (8) images + five (5) words/sentiments

Next up is Take a Leap of Faith

Available for purchase on June 12, 2020
4×6 stamp set
Retails for $16.00
Includes twelve (12) stamps – seven (7) images + five (5) words/sentiments

And now, let’s see the stamps in action!

My personal beverage of preference is coffee. I love coffee and I drink it slow and treat it as an indulgence, although with children around, I tend to drink it slow anyways…. slow as in I get a sip and then have to go get some things done and then another sip later until my coffee is cold and done. haha. However, on cool nights, I enjoy hot tea especially soothing hot tea like chamomile or lavender. What about you?

While designing this set, I was inspired by my love for baked goods and fancy tea sets which is what I colored to create this card. I stamped all the images on smooth white cardstock and colored them with colored pencils. Then I fussy cut all the images out while watching some Youtube videos. Next, I die-cut the round window and stamped the sentiment on my card base. I drew the white ‘steam’ coming out from the teapot with a white gel pen. To create the window panel, I used a laminating pouch! I put some large glitter into the pouch and run it through the laminator. This is a technique I learned from one of Jennifer Mcguire’s videos. I like how it creates dimension and still allow the card to stay flat and easy to put in the mail.

Summer is my inspiration for this set. Although we don’t have a trampoline set in our backyard, but somehow Summer makes me think of kids jumping up and down on a trampoline and of course, beaches and swimming pools! From there, I imagined Bear, Rabbit and Kitty leaping into the air having fun together. The sentiments makes this set versatile enough for use not only as a summery card but to offer encouragement as well and we all need a little of that once in a while, don’t we?

I decided to make a pop up card with the stamps from this set. I used distress inks to create a little sunset scene for my little critters. And if you can guess, I am quite a DIY-er and this ‘cloud stencil’ is handcut and made by me… Maybe we should have some stencils in the next release? What do you think? Anyways, I used my homemade cloud stencil to create this sweet sunset scene as a backdrop for my pop up card. For the front part of the card, I die-cut the circle window, stamped the sentiment and added the clouds from the set. I used Finetec glitters to add shimmer onto the clouds. Next, I used a white gel pen to add some stars.

For the pop-up section of the card, I stamped all the images on smooth cardstock and colored them with colored pencils before fussy-cutting them. I wanted the critters to look dimensional so I adhered them on stiff acetate that I recycled from some packaging before popping them up on some cardstock. If you would like the mechanics on how to create this pop-up card, please let me know in the comments below and I can record a step by step tutorial to share it with you all 🙂

Pop-up cards are so fun to make, they always put a smile on my face!

INSPIRATION FROM THE DESIGN TEAM

Amy Tsuruta

CLICK HERE to see more from Amy

Annette Allen

CLICK HERE to see more from Annette

Emily Leiphart

CLICK HERE to see more from Emily

Heather Hoffman

CLICK HERE to see more from Heather

Patricia Roebuck

CLICK HERE to see more from Patricia

And that concludes our Debut Day 2 inspiration from our Design Team. We hope that you are liking what you see and we can’t wait for you to create with these stamp sets too. Come back tomorrow for Debut Day 3! It’s going to be a swim in the sea 🙂

Keep Crafting and Smile Always,
Evelin

Posted on 18 Comments

June 2020 Release | Debut Day 1

We hope that you enjoyed the Sneak Peek video we shared on our blog yesterday. If you missed it, just click here or scroll down to watch it. It’s plenty fun!

For Debut Day 1, we will be showcasing our first two stamp sets of this Release.

First up is Under The Sea: Narwhal

Available for purchase on June 12, 2020
4×6 stamp set
Retails for $16.00
Includes twenty-three (23) stamps – twelve (12) images + eleven (11) words/sentiments

Next we have Floral Surprise

Available for purchase on June 12, 2020
4×6 stamp set
Retails for $16.00
Includes seven (7) stamps – one (1) large image + six (6) words/sentiments

And now, let’s see the stamps in action!

To create this card, I made my own ‘waves’ stencil. That’s right. I designed my very own waves stencil because when I had the idea to create this scene, I realized I don’t have any stencils that could give me the effect that I wanted. It was really fun and easy to make. After I made my stencil, I used distress inks in different shades of blue to achieve the layered look of the waves. As for all the images, I first stamped them onto white cardstock, lightly watercolored them and then used colored pencils to add depth and definition. Next, I fussy cut all the images and adhered them onto the card base using glue. The narwhals and beach ball are actually adhered on a piece of acetate. I added foam tape on the frame so that the image looks more dimensional.

If you are interested to learn how I made my ‘waves’ stencil and how I use it to create this card, let me know in the comments below and I will record a tutorial for you.

I actually started designing this large floral stamp before the end of last year. One of my designer friends told me that she likes coloring bigger florals which inspired me to create a large floral bouquet. However, I had to add my little critters to make this design uniquely mine. Anyways, who can resist a little faery pup or a little faery kitty? For this card, I stamped the image on watercolor paper but used colored pencils to color it in instead. This gives the textured feel to the colored image. If you want it to look smooth, then opt to use Bristol smooth paper or even white cardstock to give you a smooth finish.

As for me, I wanted to try something different and create a textured look and that is why I chose to use colored pencils on watercolor paper instead. After coloring the whole image, I used a black gel pen to darken the eyes for the faery pup and kitty.

INSPIRATION FROM THE DESIGN TEAM

Amy Tsuruta

CLICK HERE to see more from Amy

Annette Allen

CLICK HERE to see more from Annette

Emily Leiphart

Emily shared a video using Floral Surprise

CLICK HERE to see more from Emily

Heather Hoffman

CLICK HERE to see more from Heather

Patricia Roebuck

CLICK HERE to see more from Patricia

I hope that you have been inspired by all the creations that the Design Team has put together to showcase these two sets.

Remember to check back here tomorrow as we continue to debut our June Release and to find out how you can participate and stand a chance to win at our Giveaway! Psssttt……We are giving away two prizes!

Keep Crafting and Smile Always,
Evelin

Posted on 5 Comments

June 2020 Sneak Peeks

Hallo Friends,

It’s been a while since our last release. Things doesn’t always go according to plan when there’s a baby involved and then a global pandemic happening.. oh boy! This year has truly shown us that the only constant in life is change.

BUT, we are so excited about what we have coming up this Release! There is just SO much to love and our entire team is anxious to share what’s in store for all of you.

Here’s a short video for you to get a peek at what you have to look forward to this Release!

Evelin T Designs June 2020 Release
It’s going to be a fantastic week here at Evelin T Designs with all of the new stamps and inspiration that we have to share with you. Join us tomorrow as we begin showcasing our new Release!
Posted on 3 Comments

Guest Designer | Noga Shefer

Hi crafty friends, I am so happy to be guest designing again today for the amazing Evelin T Designs !  
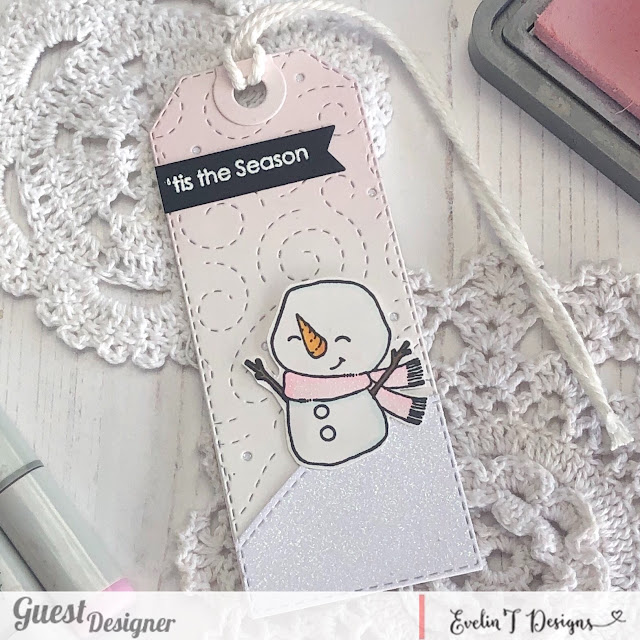
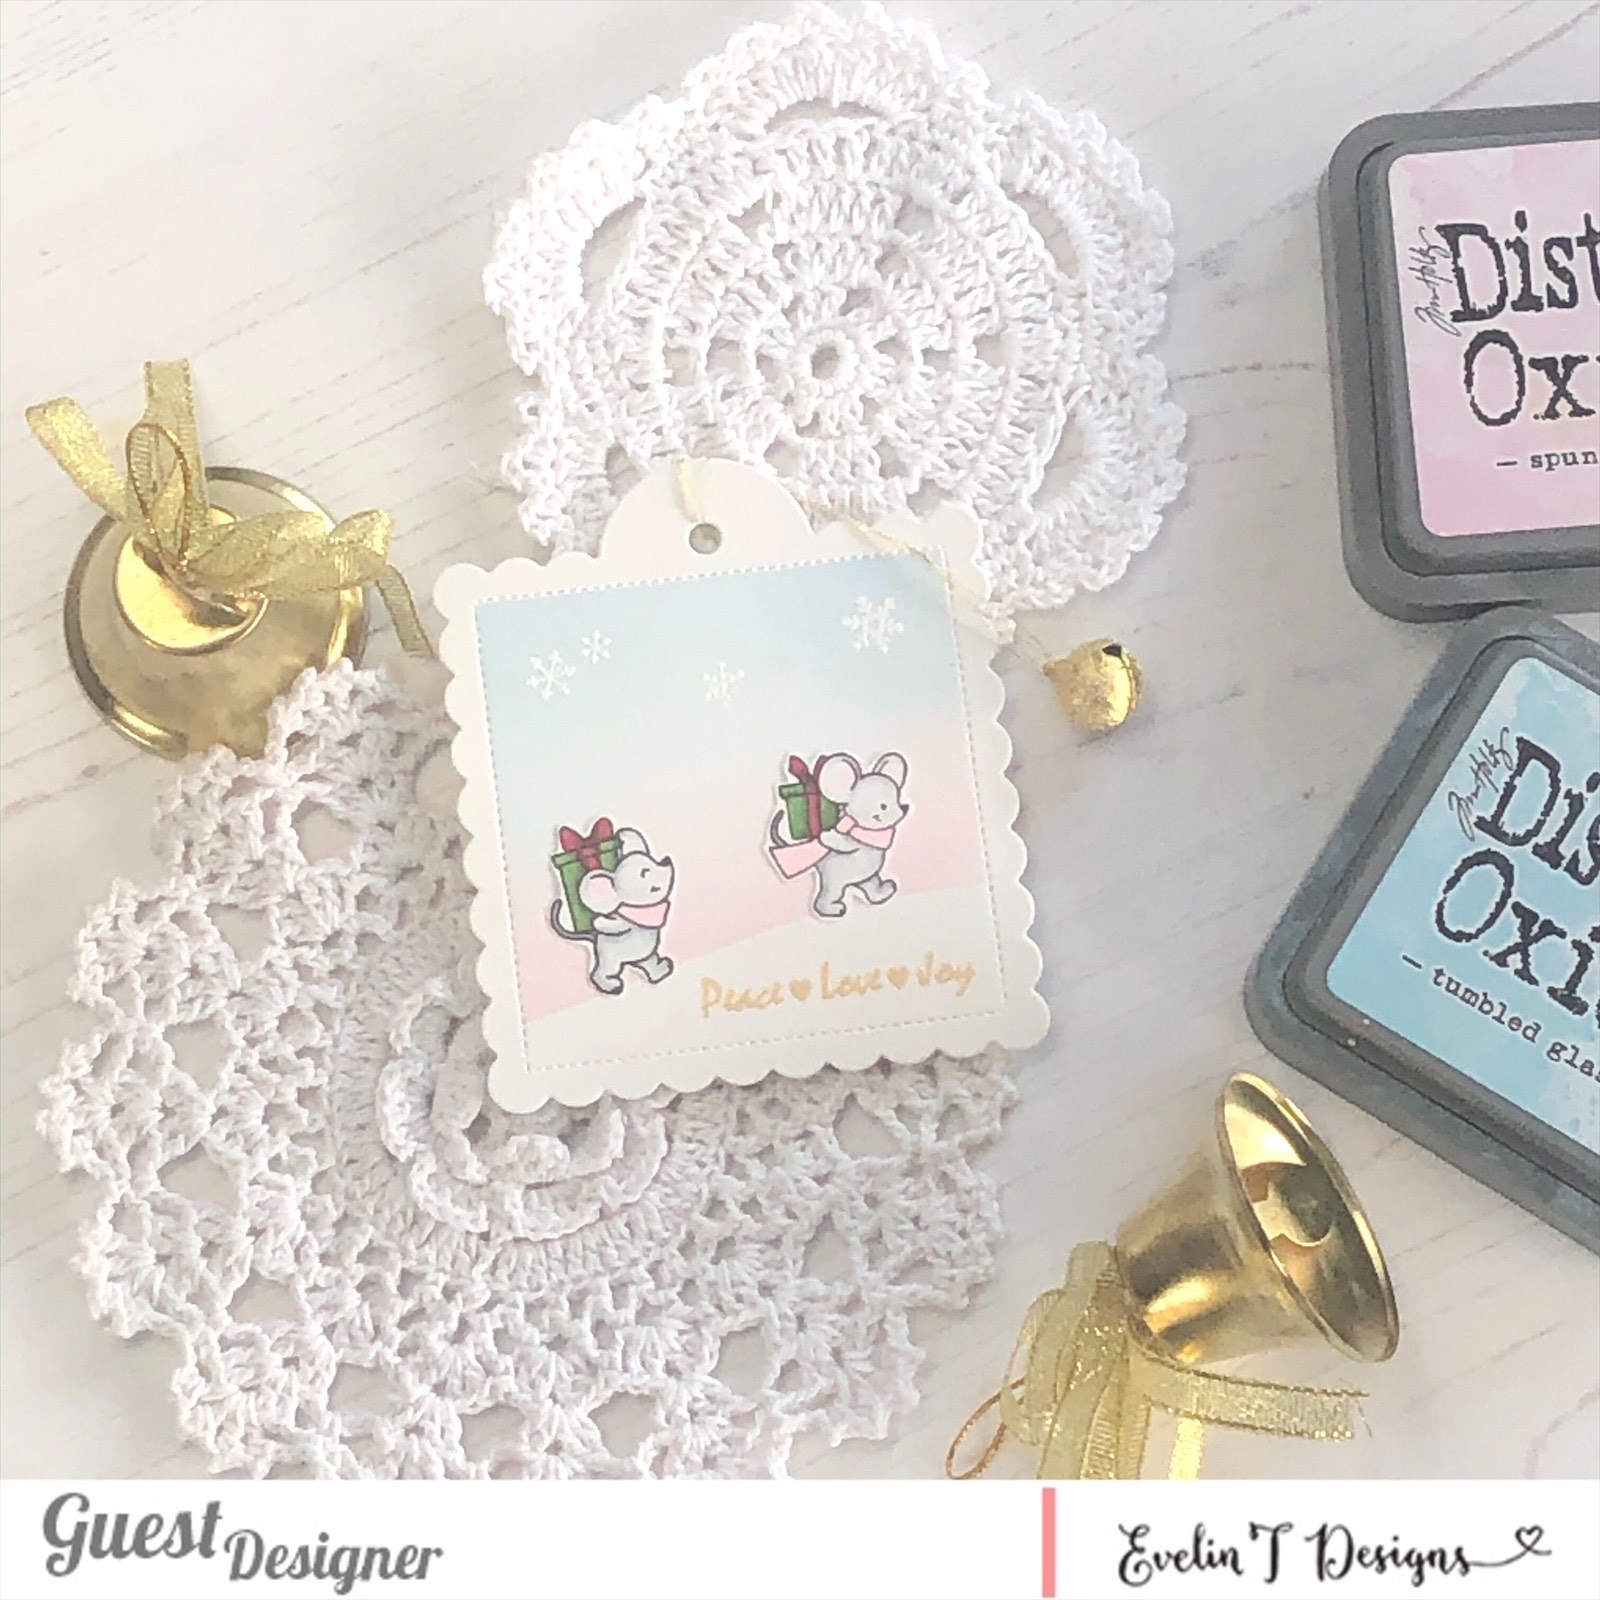
I made another unique tag for this GD.

product tag, bookmark by guest designer Noga Shafer

My tag featuring the adorable Good Tidings to You. This set is just perfect addition to your stash!  To make this tag, I die cut a piece of Bristol smoosh using a tag die. The  background was created by blending spun sugar distress oxide ink and swirls die.
I glued “the slope” using white glitter cardstock.  

Next, I stamped and colored the adorable image using copic markers and glued it to my tag with foam tape.

Next, I stamped a greeting from this set using white powder and heat embossed it on black banner and the tag is ready!

I hope you enjoy the project I created and feel inspired to create!

Have a wonderful day! 

Noga

Posted on 4 Comments

Good Tidings to You Frameless Shaker Snowman Card

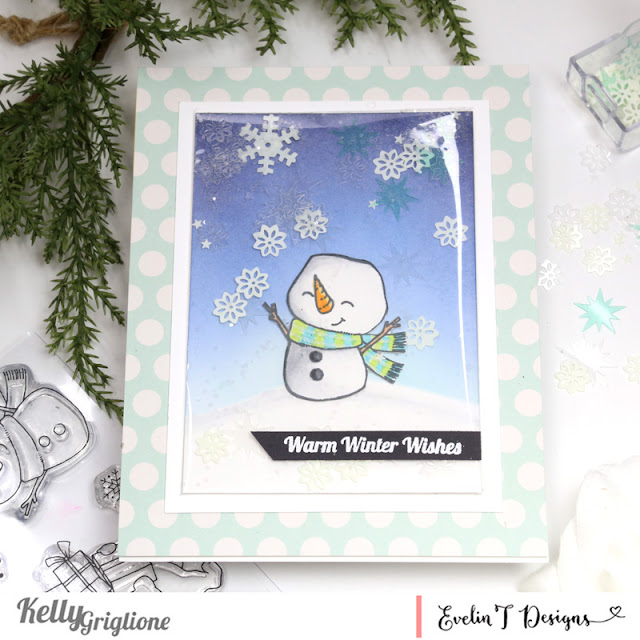
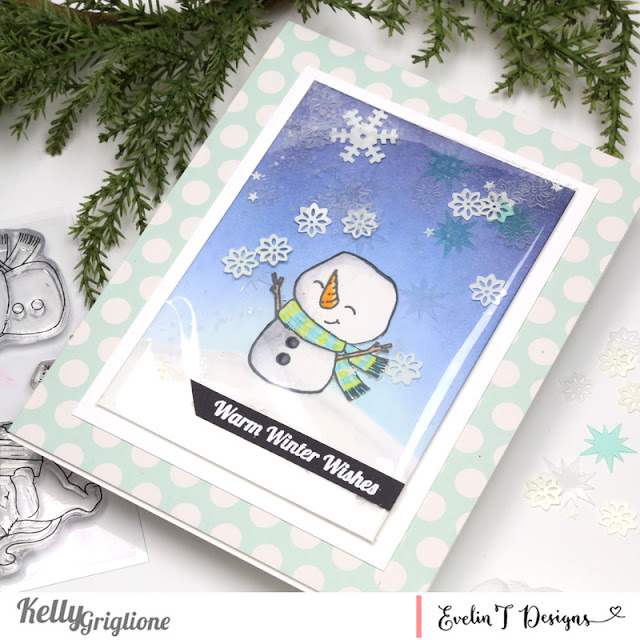
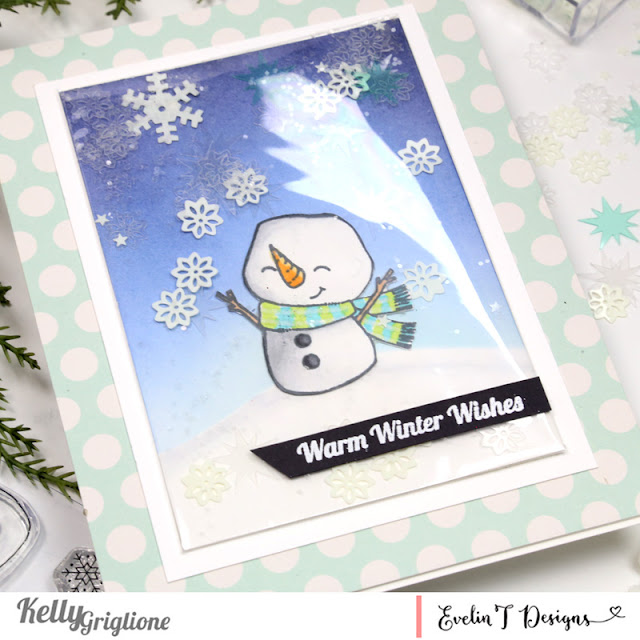
Hello Friends! Kelly Griglione here to share a really fun card featuring the darling snowman from Good Tidings to You using a new-to-me technique that I recently saw Ilda Dias use … frameless shaker cards! Although I love how shakers look, I was never really a fan of making them because I didn’t like using all of that foam tape. Plus the bulk made it difficult to mail.

With this style of shaker card though, you skip the foam tape and bulk. Instead, wrap clear mylar, acetate, packaging, report covers, cellophane, basically anything you can find that’s clear, around the area you want to shake. You could make the entire card a shaker if you wanted to! Obviously the thicker the material you use, the better your card will hold up.

I grabbed one of my husband’s clear comic book bags and cut a piece that would fit around my panel.  Then I added the shaker elements to my panel, folded the sides of the clear mylar back behind the panel, and secured all the sides with tape.  I like that the snowflakes move around plenty when you shake it, but it also tends to hold the shaker contents in place. It’s a good balance. Love how the snowflakes float around the darling snowman like it’s really snowing. 

I’ve only used the snowman here, but the Good Tidings to You set has five other adorable illustrations. Evelin always draws the cutest critters ever! I just want to give this guy a big hug!
Thanks so much for stopping by!
Kelly Griglione
Posted on 3 Comments

Guest Designer | Noga Shefer

Hi crafty friends, I am so happy to be guest designing again today for the amazing  Evelin T Designs ! I am really excited about it.  

I made a unique tag for this GD.

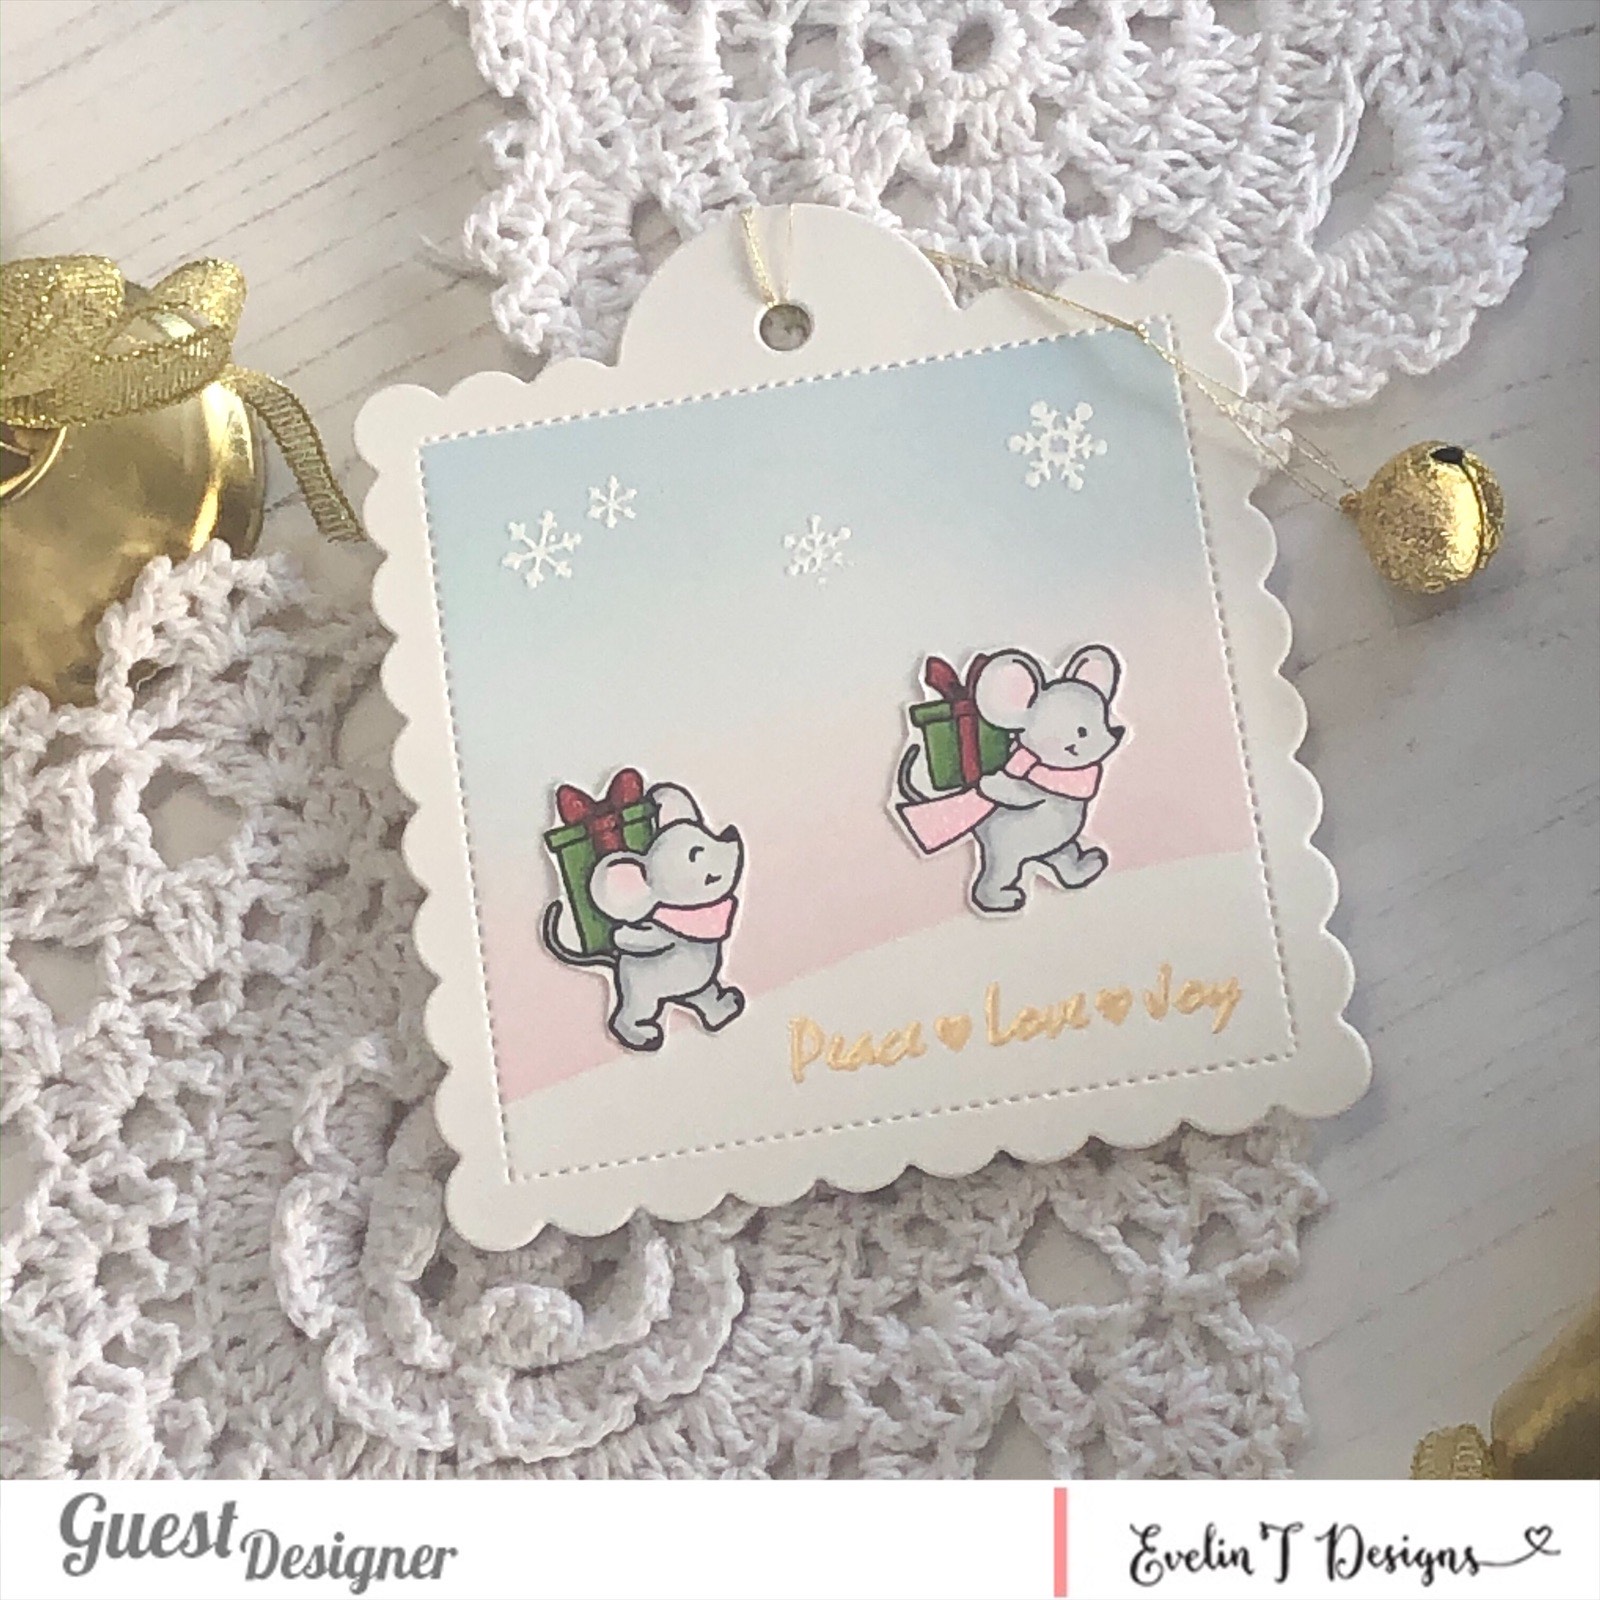
My tag features the adorable stamp set called Good Tidings to You. This set is just perfect addition to your stash! To make this tag, I die cut a piece of Bristol smoosh using a tag die.

To make the background, I masked off by blending spun sugar and tumbled glass distress oxide inks. Next, I stamped and colored the adorable images using copic markers. After that, I stamped a greeting from this set using gold powder and heat-embossed it.

As a final touch I heat embossed a few snowflakes using white powder.

I hope you enjoy the project I created and feel inspired to create!

Have a wonderful day! Noga

Posted on Leave a comment

All is Calm, All is Bright

Happy Monday, everyone! 
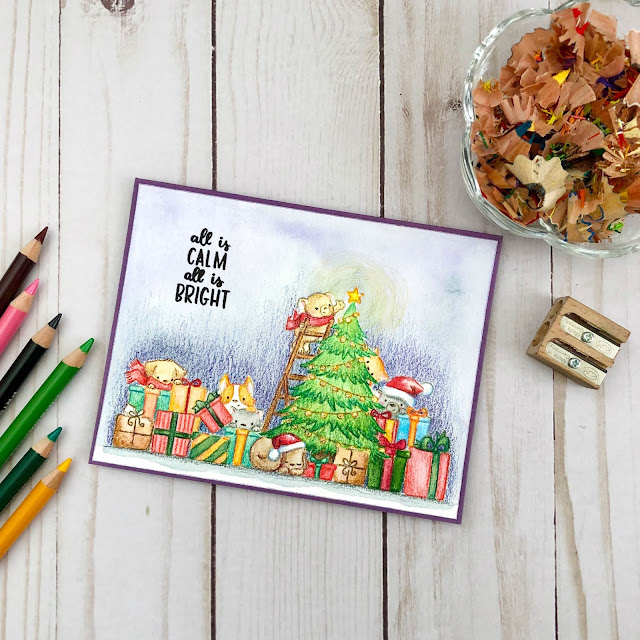
It’s Evelin here today and I will be sharing my process video creating this card from our All is Calm set. This set features a single large stamp (with accompanying sentiments) that is so much fun to color. It is truly an art therapy piece!
I stamped the image using a light brown ink pad that I had from ages ago and then watercoloring it and used colored pencils to add depth and details.

For this card, I used cold pressed watercolor paper which is why you can see more textures on the colored image. Cold pressed watercolor papers are slightly textured by nature which is great for watercolors because it is more absorbent but creates a more textured finish when layered with colored pencils. Unlike smoother papers in which colored pencils can go on more smoothly.

So, depending on the style and feel of the card you want to create, you can choose different types of paper to try as well 🙂

I even used gold Stickles to add some ‘bling’ to the Christmas lights on the tree. Does anyone still use Stickles? haha… Most of the times, I just use what I already have in my stash, so I hope that it inspires you to ‘shop’ your stash before creating your cards too.

You can watch the video HERE on our YouTube channel.

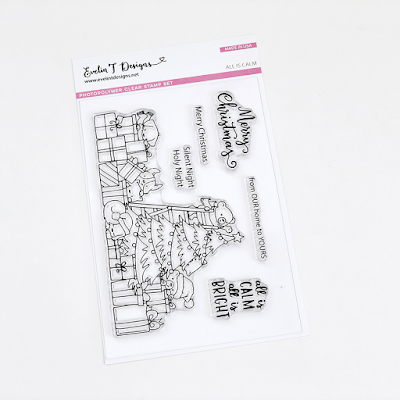
Here is the stamp set used to create this card:

I hope you enjoy watching it and have a great day!

Posted on 41 Comments

Fall | Winter Coffee Lovers Blog Hop

Happy Friday, everyone! It’s Evelin here today with a very special post. We are super excited to join the Fall/Winter Coffee Lovers Blog Hop. Evelin T Designs is also proud to be a Super Sponsor for this Hop. You can link up your newly created coffee, tea and or cocoa projects for a chance to win many prizes, including a $25 Gift Certificate from us!   This Hop will run from Friday, Nov 1st – Friday, Nov 8th. Make sure to stop by the Coffee Loving Cardmakers Blog to find out all the details on how to win prizes.

Here is the card that I created for this Hop. I used the 3 little critters from our Warm Winter Wishes stamp set and did the no line coloring technique on them. I am kind of enjoying doing no line coloring currently. I like how it produces a softer image after I am done coloring as compared to stamping the image with black ink 🙂   I also have a short process video of how this card came to be and you can watch it HERE on our YouTube channel. In the video, I shared about the paper I used to stamp for no line coloring and how I like it.  I hope that you like this card that I made for this Hop and enjoyed the video as well.

This is the stamp set used to create this Shaker and No Line Coloring card:

Hope that you will join us on this Hop and I can’t wait to see what coffee projects you will create!
Happy Hopping!

Posted on 5 Comments

Skate-Your-Own-Greeting with Fun in the Snow

Hello! Kelly here with a card idea that you can completely customize for what you need!

One of my favorite little critters from Evelin’s winter stamp sets is this adorable ice skating bear from Fun in the Snow. The way his arms are open wide, and his proud expression, makes it seem like he is showing off his skating abilities. When this set was released, I created a card with the heart doodle by the bear’s skate to make it look like he had just finished skating a little heart in the ice. As we were creating that card, I had an idea that I could really make it look like he had just finished skating whatever design or word I wanted. So that’s what I did here!

I sketched out my “noel” greeting in pencil first, and then went over it with a felt-tipped pen. I think this would be a cute idea for customizing a card with a person’s name, the city they just moved to, or even their favorite sports team (use the team colors in the bear’s scarf!) So many different possibilities!

The “ice” is made from smooshing ink onto a stamping block, adding a few drops of water, and then placing the cardstock in the ink. It’s always a surprise what you get!

The “from OUR home to YOURS” sentiment is from All is Calm and could really be used on any holiday card you create.

Only a few days until Halloween, and then the holidays will really seem like they are just around the corner. Hope you’re collecting lots of ideas these past few weeks. I know I am!

Thanks so much for stopping by!

Kelly