It is so heartbreaking to read about the devastation that Hurricane Dorian wrecked in the Bahamas.
I am at a loss of words to describe how I feel so right now, I think the best course is to take action and we at Evelin T Designs are pledging to donate 10% of all sales from September 6th – 19th, including those from our new release, to Global Empowerment Mission.
Hallo and Welcome to the first day of Sneak Week for our September Release. This will be our second release and we are so excited to share what we have in store for you!
First up is this set called All Hallow’s Cuteness. I have had so much fun creating an interactive card with this set but of course, you can also create CAS cards with it. It’s a really fun set that will coordinate effortlessly with tomorrow’s set (you will have to wait for tomorrow to sneak a peek!)
Our September Release will be available in our Store on Monday, September 9th at 9am EST. It’s super easy to remember the date and time for this release… it’s all N-I-N-E-s!
For more sneaks from our Designers, hop on over to Instagram where I linked their accounts and their sneak pics.
Hi folks! Kelly here, excited to share a card made with the adorable Reading Buddies set! I actually made this card during the first release, but wanted to hold off sharing it so I could devote some time to discuss stamp selection when it comes to building a background.
This Reading Buddies set has some adorable images, like the cute critters carrying books, as well as a sweet scene of a girl reading with her forest friends. Any of these images are great to feature on a card. After you’ve played around with these on a couple of cards, however, I’d recommend taking a look at the secondary images, like the pile of books. I thought stamping the books in a pattern would make a fun background.
And, you get a completely different look to stretch your supplies!
Whenever I make a background like this, I try to figure out what the overall shape of the image is. In this case, the pile of books with the one book on its end is essentially a large rectangle. To help illustrate this I’ve drawn rectangles over the books below …
I first stamped the “rectangle” of books vertically in the upper left corner, then rotated it 90 degrees to stamp horizontally in the top middle, and finally rotated it back to stamp the books vertically in the upper right corner. With that row completed, I can move on to stamp the second row, only this time I stamped the image horizontally, vertically, and horizontally across the card. This fills in the gaps left from the top row.
I repeated that stamping for the bottom half of the card to complete the background. To color the books I picked several copic markers in cool tones and rotated them to balance out the colors. Colored pencils would work as well for all the thin lines. I also grabbed a few shades of cream to color the book pages.
And just like that, your background is completed! With the sentiment and the background of books, I think this card would be perfect to send someone in your book club, or a friend who enjoys reading.
Hope you enjoyed this little tip on building your own backgrounds, as well as picking out a secondary stamp, to get an entirely new look from your stamp sets!
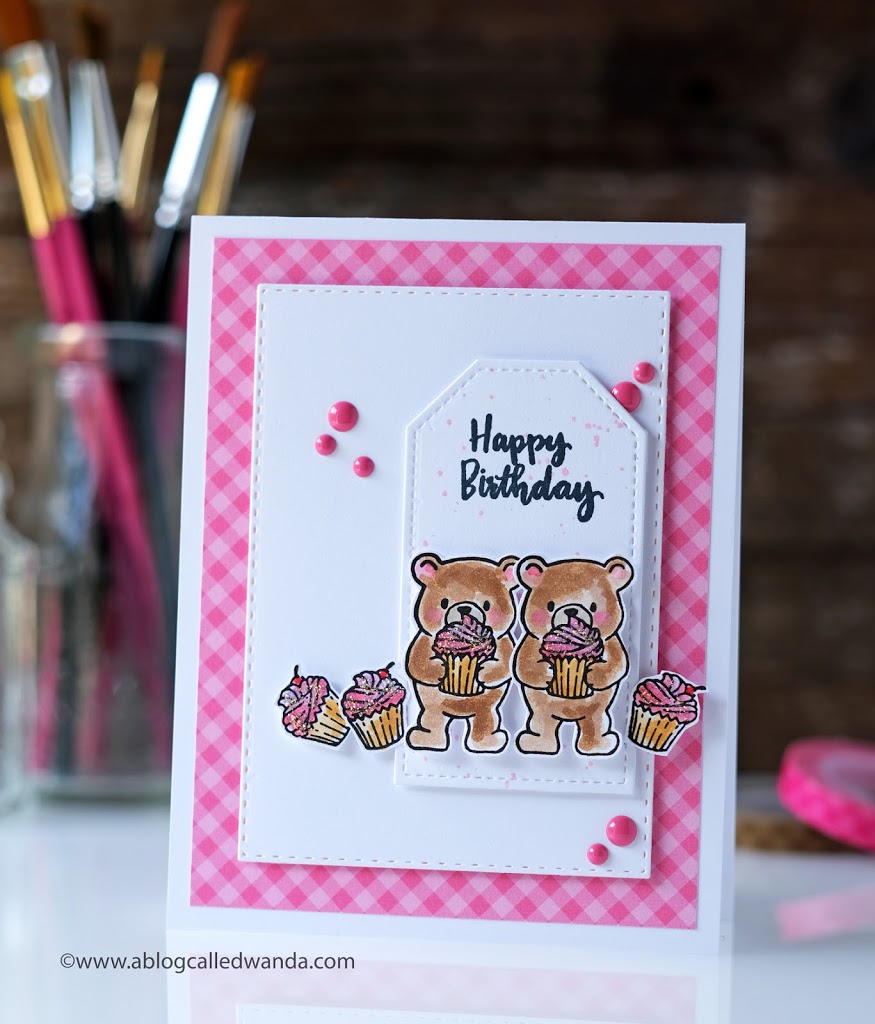
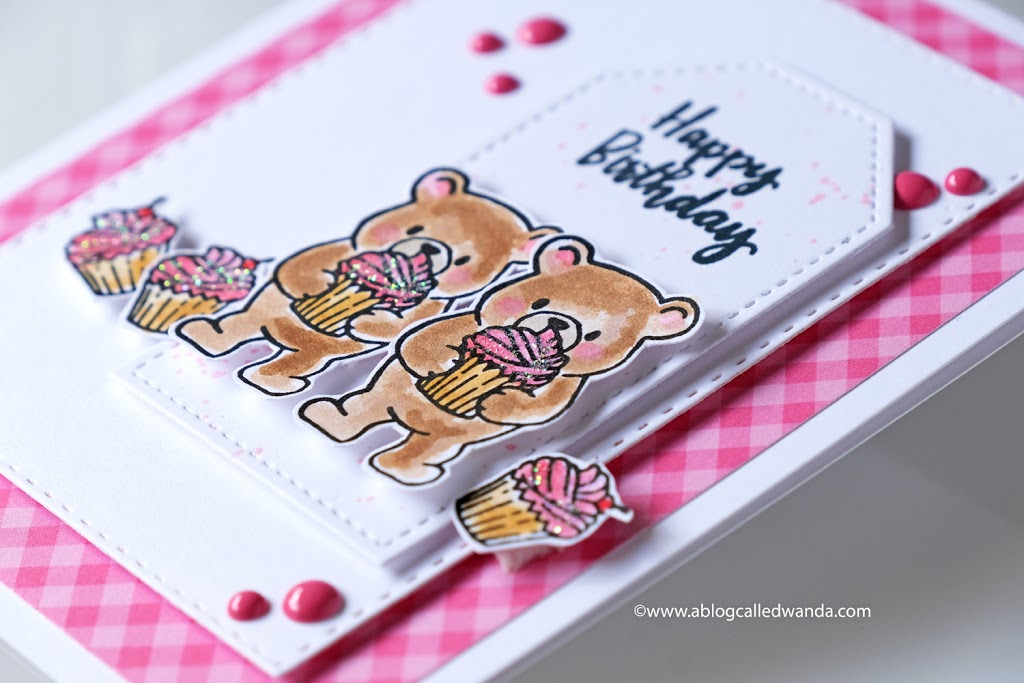
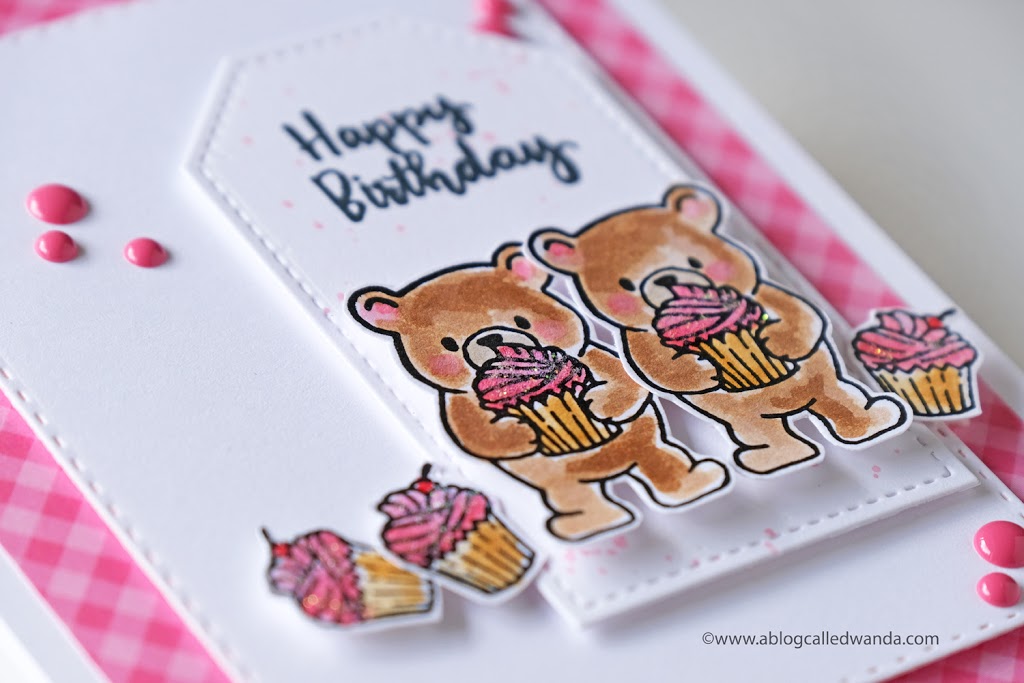
Hi, Wanda Guess here and I’m so excited to be on Evelin T Designs’ Blog today! I’m sharing a sweet and cheerful birthday card made with the really cute stamp set called Coffee Loving Critters! My finished card is an A2 size.
I added a layer of pretty pink gingham paper, then one white layer, and then a tag. I like to create visual interest with paper layers. One of my favorite techniques! I stamped two bears and three cupcakes in Archival Ink. I used Distress Ink pads and a water brush to loosely watercolor everything. Then I fussy cut out the images with my detail scissors. I added some glittery glue to the tops of all the cupcakes. I splattered some pink ink onto the tag and then stamped the sentiment onto the tag. The sentiment is from the Coffee Art stamp set. Everything is affixed to the card with foam tape.
Finally, a few enamel dots to finish off the card! The perfect birthday card for any age. Thanks for having me as a guest Evelin!!
Hi crafty friends! It’s Keeway and I’m excited to be guesting on the blog today to share wtih you a fun shaker card using the adorable Sneaky Kitties. I stamped this large image of the kitties in the foliage in a dark brown hybrid ink and colored it with copic markers. Then I used my ScanNCut to cut out the image.
I created a window using a Reverse Stitched Scalloped Circle Window die out of Spiffy Speckles pattern paper in purple. I also die cut the sentiment ‘friend’ using the SSS Friend Outline die out of purple glitter card stock and white card stock. I inlaid the white pieces in the purple outlines and added it below the kitties. And right below that, I stamped the sentiment ‘you’re one of a kind’ from the Sneaky Kitties stamp set.
I decided to make this into a shaker card. The bottom layer was ink blended with Bundled Sage and Antique Linen distress oxide ink, then I used foam tape to frame off the area behind the window. I added so fun iridescent sequins and sealed it off with a layer of acetate.
Finally, added my front panel to the card and mounted the entire piece onto a top fold A2 vertical base card.
That’s it folks! Hope you enjoyed today’s dose of inspiration and have a great week!
Hi! It’s Evelin here today and I would like to share a short Video with you on how I created this card using our Evergreen Foliage stamp set. I love the process of how this card came to be and I hope that you will click on the video link and join us over at our YouTube channel to watch it!
Hope that you will be inspired to create your own version of cards using the technique that I am sharing in my video. Please use the hashtag #evelintdesigns on Social Media if you use any of our stamp sets in your creations for a chance to be featured.
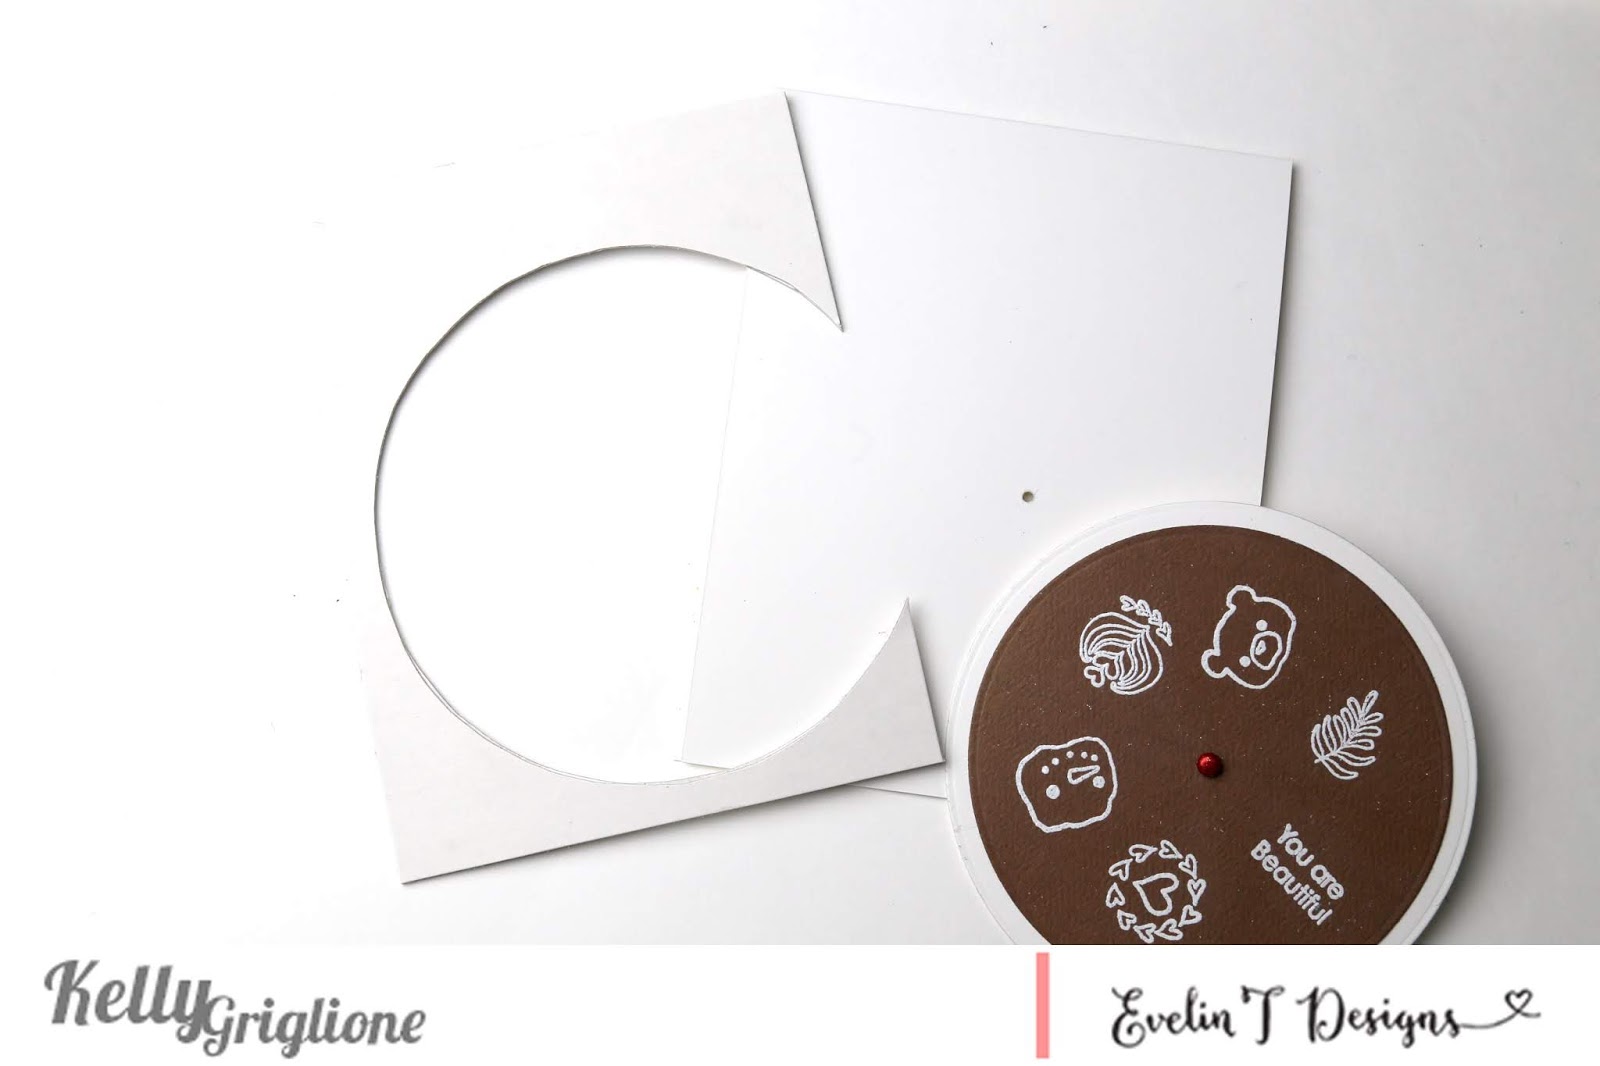
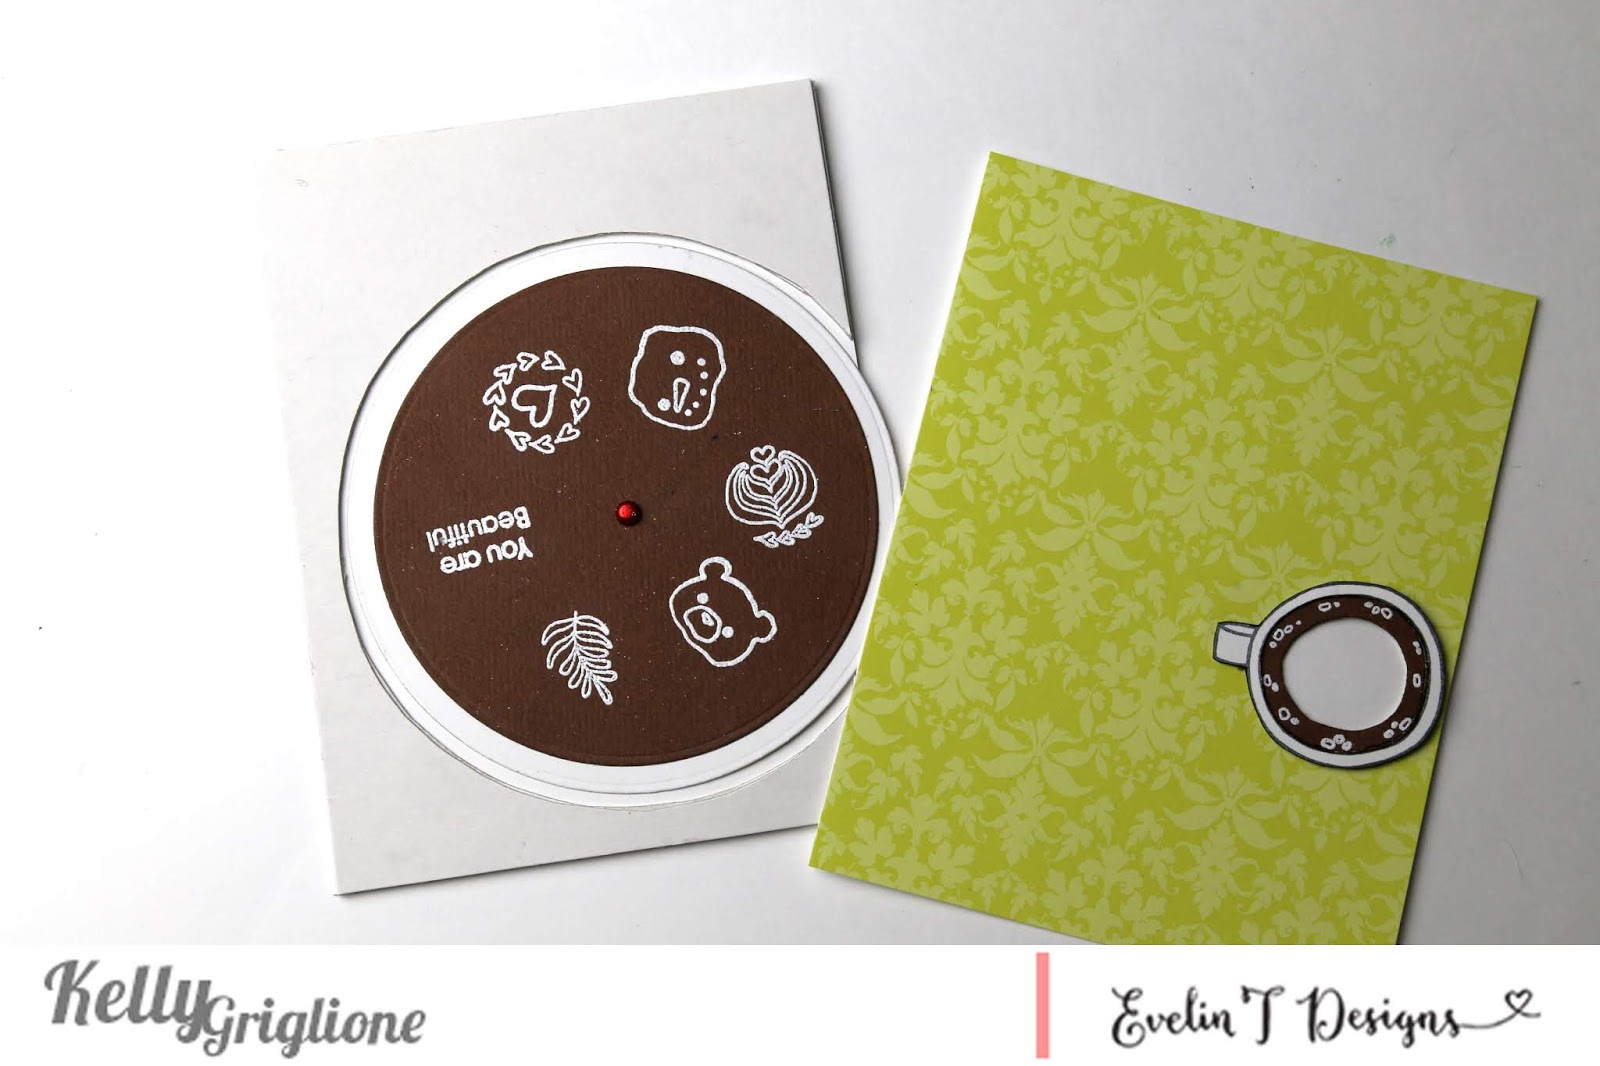
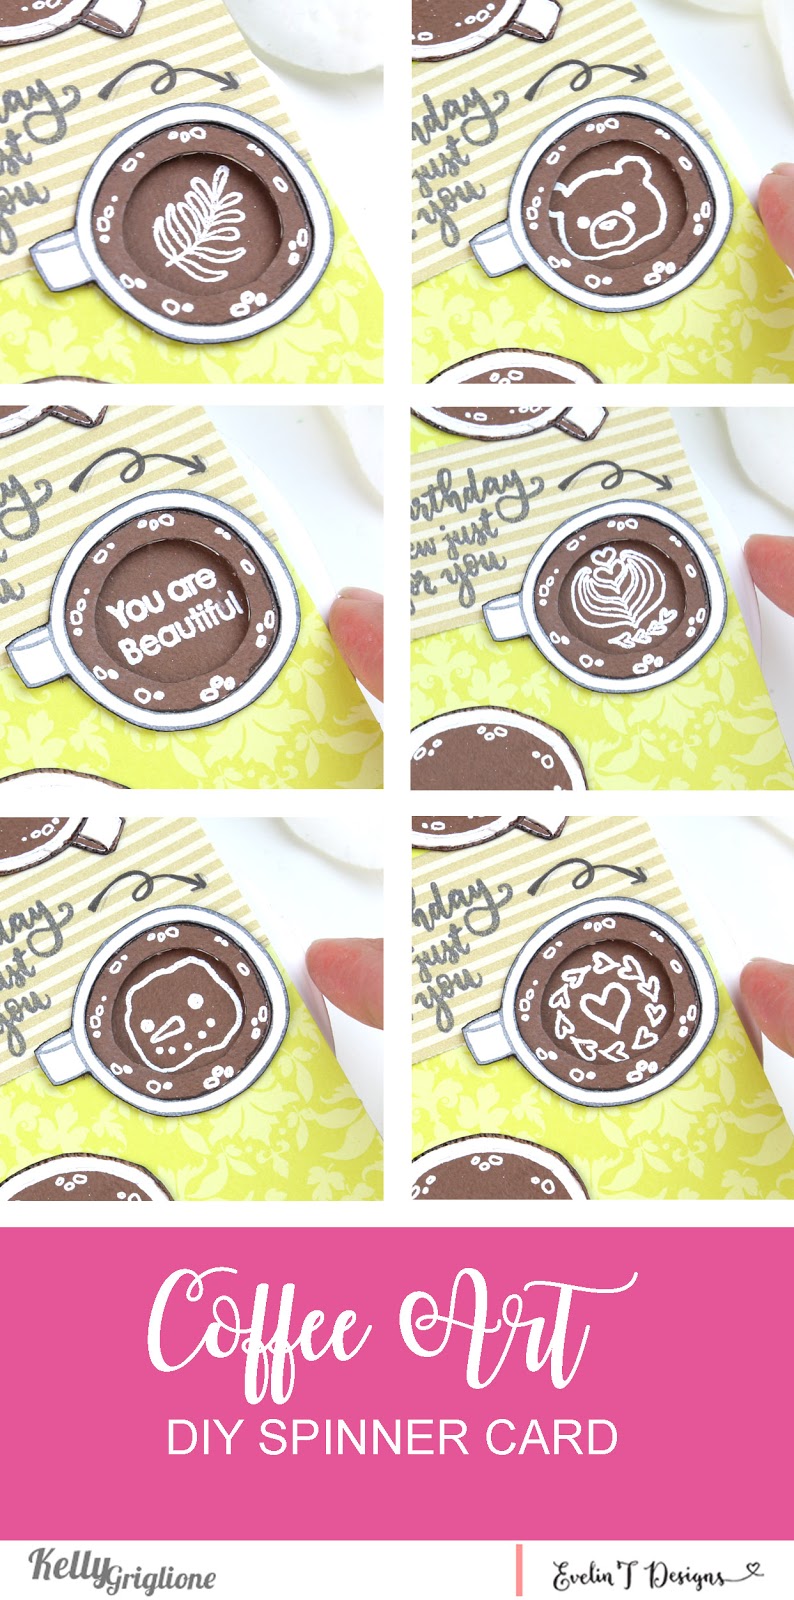
Hi Folks! Kelly Griglione here with a fun, interactive card for your favorite coffee lover! The new Coffee Art set is loaded with all sorts of different art you can add to your coffee. And why pick just one?! I sure didn’t want to, so for my first design team post I set about creating a spinner card featuring ALL the coffee art!
No special dies needed, just some good old-fashioned construction skills that I’m going to share here. To begin with, I designed the top of the card with all the cute coffee cups, and picked one of the coffee cups to showcase the changing art inside. For that cup I cut a circle out of the inside to make a window.
For the mechanism inside I cut a circle from brown cardstock (if you don’t have a circle die, just trace around a tin can or something else in your kitchen). Then I poked a hole in the center and put the tip of a pencil through so I can mark where it should be attached to the card base. At this point you should also line up the top of the card over the brown circle to make sure the art will show through the window in the coffee cup. This is when I realized the brown circle was a little too small to hang over the edge for it to be spun. No worries, I just cut a larger white circle and adhered it underneath the brown circle. Then I put a brad through the middle of the circles to attach them to the card base.
To make sure the art is stamped in the right place, I divided the brown circle in 6 equal sections and lined up the top of the card over everything. I stamped the coffee art through the window of the coffee cup, spun the circle to the next section, stamped another coffee art, spun the circle, stamped, spun, stamped, spun, etc.
To make sure the brown circle spins freely, I built up some layers around it.
Then I adhered the layers to the card base, and attached the brown circle spinner with a brad to the base. The top of the card is adhered to the layers. Now I can add the rest of the coffee cups and sentiment to the top of the card.
And here it is all assembled!
As you spin the circle, a new piece of coffee art appears! The recipient can have a new card almost every day of the week.
And here are all the different variations! Would you like to see it in action?
Fun, right?! I really enjoy making interactive cards like these. It’s a challenge to see if I can take an idea and make it work.
I hope you enjoyed seeing this spinner card take place, and maybe have some ideas of your own to try!
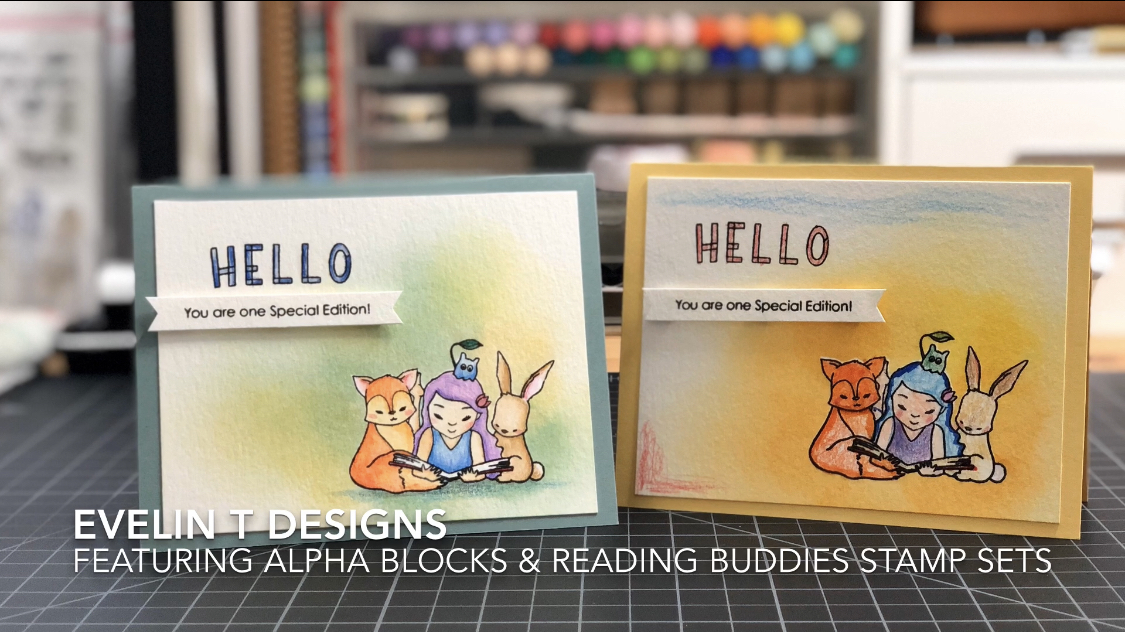
Happy Thursday! Head on over to our YouTube Channel today to watch my kiddo and I crafting using Alpha Blocks and Reading Buddies. He really wanted to share how he made this card and we hope you will enjoy watching it!
We do have a Giveaway that is currently going on, check out this Postfor all the details on how to enter!
Have a great day! One more day to Friday and onwards to the weekend… yippee!