Posted on 2 Comments

Coffee Love….

Happy hello Evelin T. Designs friends… Annette Allen here with you today to share two fun cards I created using Evelin T. Designs: Coffee Loving Critters and Coffee Art stamp set. This month the design team is featuring these two stamp sets so make sure to join us every Monday for more fun inspiration.  

Now lets get started… On this first card I used both Coffee Loving Critters and Coffee Art stamp sets.

I colored up these adorable images with Copic Sketch Markers and added a little highlights and a few polka dots using a white gel pen.  I cut out the images using my Brother scan n cut machine. I used a die and some pretty designer paper for the background and with some foam adhesives I added my images to the card. I love to give my images some dimension. 

This card was created using Evelin T. Designs: Coffee Loving Critters. How cute are those cupcakes? I colored the images with Copic Sketch Markers and again cut with my Brother scan n cut machine. 

I sprayed some Ranger Distress Oxide on the background and added some pretty designer paper. The picture frame was added using foam adhesives. I also added some polka dots with a white gel pen.   

Two simple cards and totally fun to create with these adorable stamps. 

Thanks for stopping by.

Posted on 1 Comment

Guest Designer: Wanda Guess

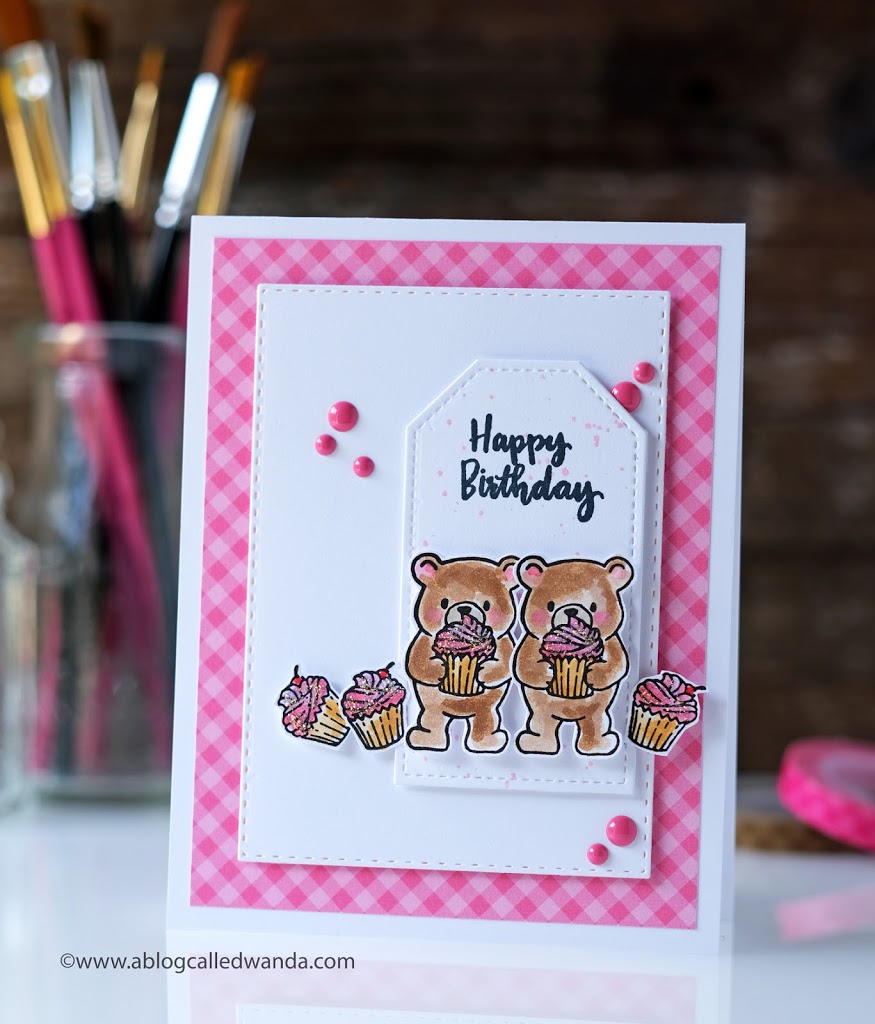
Hi, Wanda Guess here and I’m so excited to be on Evelin T Designs’ Blog today! I’m sharing a sweet and cheerful birthday card made with the really cute stamp set called Coffee Loving Critters! My finished card is an A2 size.

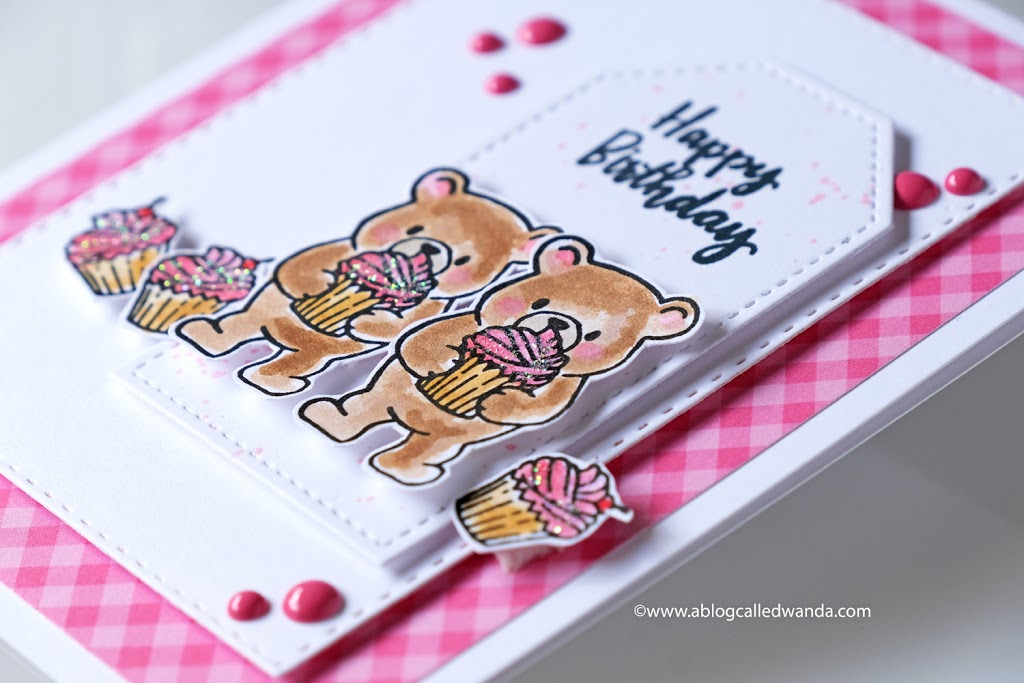
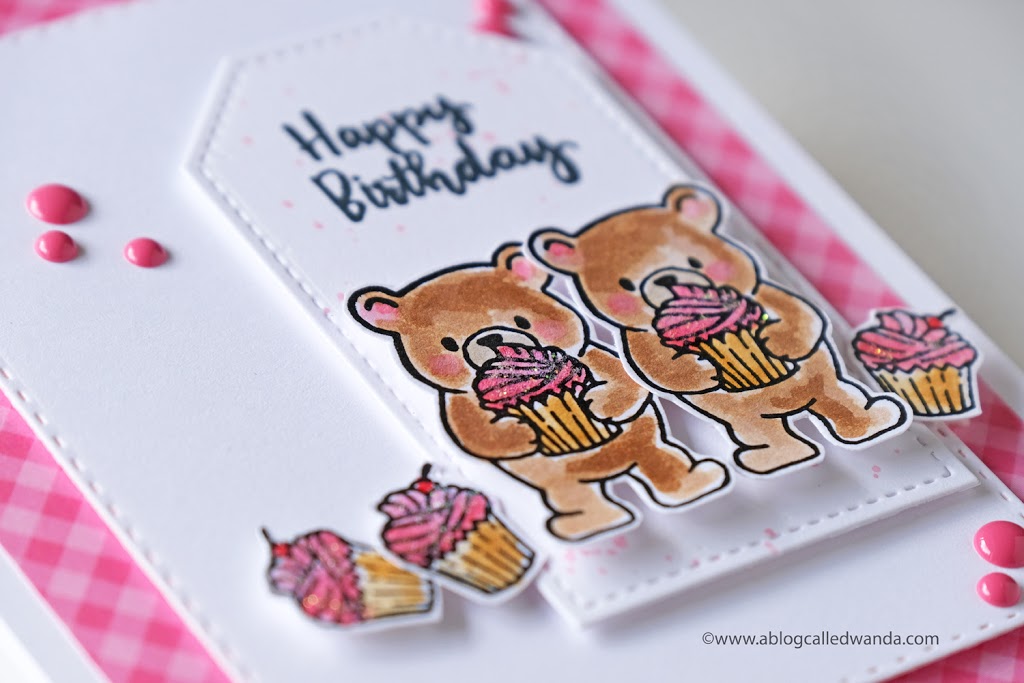
I added a layer of pretty pink gingham paper, then one white layer, and then a tag. I like to create visual interest with paper layers. One of my favorite techniques! I stamped two bears and three cupcakes in Archival Ink. I used Distress Ink pads and a water brush to loosely watercolor everything. Then I fussy cut out the images with my detail scissors. I added some glittery glue to the tops of all the cupcakes. I splattered some pink ink onto the tag and then stamped the sentiment onto the tag. The sentiment is from the Coffee Art stamp set. Everything is affixed to the card with foam tape.

Finally, a few enamel dots to finish off the card! The perfect birthday card for any age. Thanks for having me as a guest Evelin!!

Posted on 1 Comment

Friend You’re One of a Kind

Hi crafty friends! It’s Keeway and I’m excited to be guesting on the blog today to share wtih you a fun shaker card using the adorable Sneaky Kitties. I stamped this large image of the kitties in the foliage in a dark brown hybrid ink and colored it with copic markers. Then I used my ScanNCut to cut out the image.

I created a window using a Reverse Stitched Scalloped Circle Window die out of Spiffy Speckles pattern paper in purple. I also die cut the sentiment ‘friend’ using the SSS Friend Outline die out of purple glitter card stock and white card stock. I inlaid the white pieces in the purple outlines and added it below the kitties. And right below that, I stamped the sentiment ‘you’re one of a kind’ from the Sneaky Kitties stamp set.

I decided to make this into a shaker card. The bottom layer was ink blended with Bundled Sage and Antique Linen distress oxide ink, then I used foam tape to frame off the area behind the window. I added so fun iridescent sequins and sealed it off with a layer of acetate.

Finally, added my front panel to the card and mounted the entire piece onto a top fold A2 vertical base card.

That’s it folks! Hope you enjoyed today’s dose of inspiration and have a great week!

Posted on Leave a comment

Two Simple Cards…

Well happy hello Evelin T. Designs friends…. Annette Allen here with you today and I am sharing two cards created using Evergreen Foliage and Alpha Blocks.

This first card was created using Evergreen Foliage. I created a simple watercolor background and stamped these pretty images and sentiment on the background after it dried completely. I added a bit of white opaque to the little leaves. I wanted them to really shine on the card. 

Next up I created a card using Alpha Blocks. I love this fun set because you can create any greeting, sentiment that you want. I first used a misc. stencil and Ranger Oxide inks to create a colorful background. I added some NUVO Blue Topaz Glimmer Paste on top of the stenciled background. 

I stamped all the letters to create HAVE A BEAUTIFUL DAY and cut with my Brother Scan n Cut machine. Next I added some foam adhesives to the back to give each letter some dimension.   

Two simple cards and totally fun to create.  

Thanks for stopping by. Have a blessed day!

Posted on 2 Comments

Evergreen Foliage Card Trio

Hello! Heather Hoffman here this morning to share a trio of cards featuring the beautiful Evergreen Foliage paired with some fun Distress Ink blending! I basically wanted to recreate one of the designs I made for the release last month, and try some different color combos!

This design is perfect for one layer cards that are easy to mail – always nice to have in your stash! I masked off the top and bottom of each card, and used two different colors of distress ink for each one.

I tried to use colors that would blend fun in the center to almost make it look like I had used 3 colors instead of two.

I also added a good splatter of Perfect Pearls mixed with water for some texture and shine before removing the mask. This next one I didn’t have a great seal on my mask, so a bit of the color leaked under on the bottom, but I don’t think it looks to bad anyway, so I didn’t bother redoing it.

Once I removed the mask and allowed them to dry a bit, I lined up all the fun images from Evergreen Foliage in a row using my MISTI to assembly line stamp each of them.

I finished off with a mix of sentiments – all from the same Evergreen Foliage stamp set – LOVE how there are a great variety of sentiments in this stamp set as well!

  Thanks so much for stopping by today! Have a wonderful day!!!

Posted on 1 Comment

Have a Beautiful Day! featuring Evergreen Foliage

Hi! It’s Evelin here today and I would like to share a short Video with you on how I created this card using our Evergreen Foliage stamp set. I love the process of how this card came to be and I hope that you will click on the video link and join us over at our YouTube channel to watch it!

Hope that you will be inspired to create your own version of cards using the technique that I am sharing in my video. Please use the hashtag #evelintdesigns on Social Media if you use any of our stamp sets in your creations for a chance to be featured.

Till next time!

Posted on 4 Comments

Evergreen Foliage and Alpha Blocks

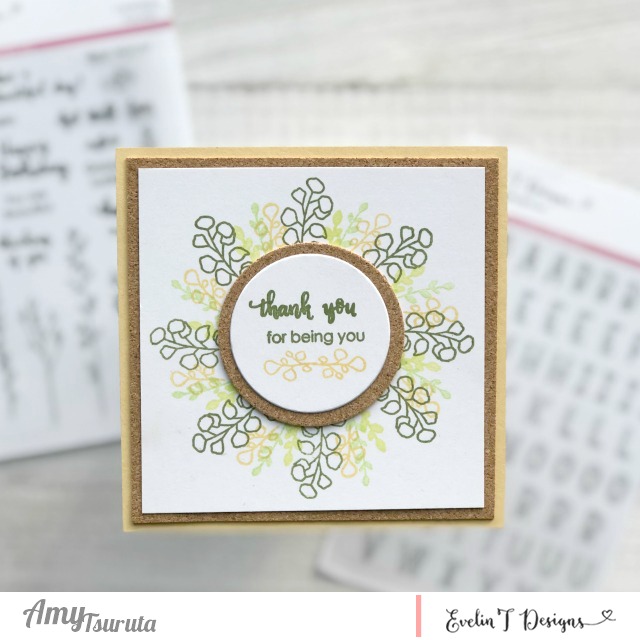
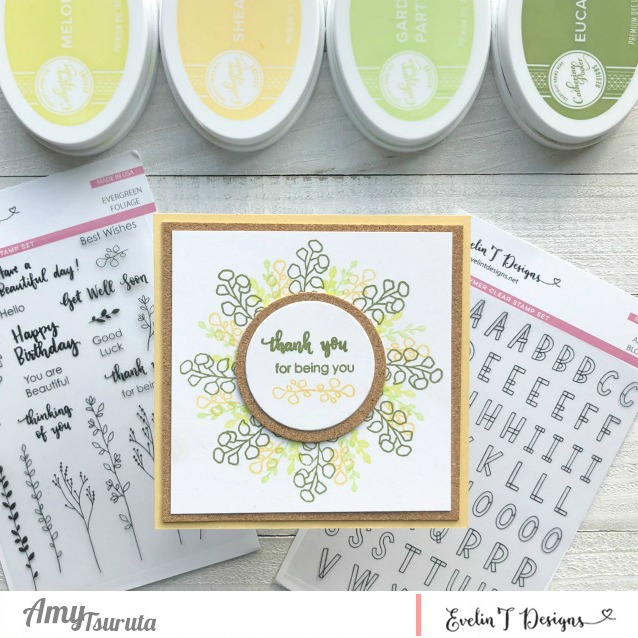
Hello Evelin T Design Fans!  It’s Amy with my first design post.  I’m so excited to show you what I made especially for today!  I’m featuring the Evergreen Foliage and Alpha Blocks sets.

My card front consists of 5 layers.  I love to incorporate layers for added interest without the additional bulk of foam adhesive.  Today’s card also includes cork layers.

I’ve been paying more attention to the interior of my cards.  I added an additional greeting.  Don’t you just love the Alpha Blocks set?  The options are endless!

I’m pretty sure that everyone loves Happy Mail!  I kept my overall color palette the same.     What are some of your favorite color combos?  I’d love to hear from you!

Posted on 3 Comments

Coffee Art Spinner Card

Hi Folks! Kelly Griglione here with a fun, interactive card for your favorite coffee lover! The new Coffee Art set is loaded with all sorts of different art you can add to your coffee. And why pick just one?! I sure didn’t want to, so for my first design team post I set about creating a spinner card featuring ALL the coffee art!  

No special dies needed, just some good old-fashioned construction skills that I’m going to share here. To begin with, I designed the top of the card with all the cute coffee cups, and picked one of the coffee cups to showcase the changing art inside. For that cup I cut a circle out of the inside to make a window.  

For the mechanism inside I cut a circle from brown cardstock (if you don’t have a circle die, just trace around a tin can or something else in your kitchen). Then I poked a hole in the center and put the tip of a pencil through so I can mark where it should be attached to the card base. At this point you should also line up the top of the card over the brown circle to make sure the art will show through the window in the coffee cup. This is when I realized the brown circle was a little too small to hang over the edge for it to be spun. No worries, I just cut a larger white circle and adhered it underneath the brown circle. Then I put a brad through the middle of the circles to attach them to the card base.  

To make sure the art is stamped in the right place, I divided the brown circle in 6 equal sections and lined up the top of the card over everything. I stamped the coffee art through the window of the coffee cup, spun the circle to the next section, stamped another coffee art, spun the circle, stamped, spun, stamped, spun, etc.

To make sure the brown circle spins freely, I built up some layers around it.

Then I adhered the layers to the card base, and attached the brown circle spinner with a brad to the base. The top of the card is adhered to the layers. Now I can add the rest of the coffee cups and sentiment to the top of the card.

And here it is all assembled!

As you spin the circle, a new piece of coffee art appears! The recipient can have a new card almost every day of the week.  

And here are all the different variations! Would you like to see it in action?

Fun, right?! I really enjoy making interactive cards like these. It’s a challenge to see if I can take an idea and make it work.

I hope you enjoyed seeing this spinner card take place, and maybe have some ideas of your own to try!

Thanks for stopping by!
Kelly

Posted on 3 Comments

Sneaky Kitties and Evergreen Foliage

Welcome everyone… Annette Allen here with you today to share my first design team post on the new Evelin T. Designs blog. I am so excited to be a part of Evelin’s new adventure. Today I created two cards using Sneaky Kitties and Evergreen Foliage stamp set.   

First up are those cute little Sneaky Kitties

I stamped the image on the card base and again on a separate piece of card-stock. I took the seconded stamped image and colored it up with Copic Sketch makers. I die cut part of the image and lined it up on my card base using some foam adhesives to give it some dimension. 

I had some misc scraps of designer paper and cut them into strips to highlight the colors I colored the image with. Finishing up with stamping the sentiment on some kraft card-stock, trimmed and adhered to card with foam tape.

This second card I created using the newly released Evergreen Foliage stamp set. 

I created a stamped background by stamping the same image multiple times. Colored with Copic Sketch markers. Finishing up with stamping this pretty sentiment on designer paper and die cutting this sweet tag. I added some burlap string and tied a bow. The tag is adhered using foam tape to give it some dimension.  

Thanks for stopping by today.

Posted on 3 Comments

Hello, You are One Special Edition

Happy Thursday!   Head on over to our YouTube Channel today to watch my kiddo and I crafting using Alpha Blocks and Reading Buddies. He really wanted to share how he made this card and we hope you will enjoy watching it!

We do have a Giveaway that is currently going on, check out this Post for all the details on how to enter!

Have a great day! One more day to Friday and onwards to the weekend… yippee!