Posted on Leave a comment

Fun-Loving Animals

Hello everyone! It’s Anita here with you today and I’m so excited to be guest designing for Evelin T Designs! I have two cards to share with you.

Tis’ the Season SlimLine Card

For my first card I used the adorable Fun In The Snow stamp set. This set includes lots of sweet ice-skating penguins and bears, making it perfect for both Christmas and Winter cards.

I made a slimline card that measures 3.5″ x 8.5″. First, I sponged the bristol cardstock with Blueprint Sketch, Chipped Sapphire, and Black Soot distress inks to create a night sky. Then, I splattered it with thinned acrylic paint to create a snowy effect and adhered the cardstock to my base. Next, I cut a snowy slope from white cardstock, inked the top with Blueprint Sketch, and adhered that to my card.

To create the pond, I cut some white cardstock and added some Peacock Feathers and Blueprint Sketch distress inks to give it a frosty look. I used foam tape to adhere the pond to my card so as to create added dimension. Next, I colored the skaters with copics and used a black glaze pen to darken their eyes and noses. To add polka-dots and stripes to the scarves and earmuffs, I used a white gel pen. Finally, I adhered the skaters with foam tape, along with a sentiment from the stamp set to complete the card.

The copics I used for the bears are BV20, BG70, E01, and E000. For the penguins, the colors I used are BV20, BG70, C7, C5, C3, and C1. Lastly, for the scarves, hats, boots, and earmuffs, I used YG17, YG03, YG01, B29, B26, B24, B21, BG07, BG05, BG02, B000, R46, R37, and R35.

Take a Leap of Faith Card

For my second card, I used the fun Take A Leap Of Faith stamp set. I just love the cute animals jumping on the trampoline!

Firstly, I stenciled clouds on the front of my card with distress ink to create the sky background. Next, I sponged Mowed Lawn distress ink on bristol cardstock, cut it with a grass die, and splattered it with water to create the splattered effect on the grass. Once dry, I stamped one of the sentiments from the stamp set and adhered the grass with foam tape. After that, I colored the stamped images with copics before adhering them with foam tape also.

The copics I used for the trampoline are C7, C5, C3, and C1. For the bunny, I used E55, E53, E51, E50, E01, E000, and R30. To complete the card, I used W3, W1, W0, and R30 for the cat and BV20 and BG70 to shade the clouds.

I hope I’ve inspired you to get inky today!

Hugs, Anita

Posted on 2 Comments

Halloween card set with clever use of stencils

Hello everyone! Jenn Shurkus from shurkus.com back here today to inspire you with some fun masking and stenciling techniques. Fall is here, a perfect time to create some Halloween cards. I know trick-or-treating may look a little different this year, so I wanted to create some fun cards to send to my niece and nephews.

I used the Its BOO-tastic and All Hallow’s Cuteness stamp sets to create this set of cards. Firstly, I started off by stamping one critter per sheet of cardstock. Then, I colored them with Copic markers and stamped the images again on masking paper, fussy cut them out and covered each of the images with the mask.

Next, I started to build a scene for each critter using some stencils. I used a grass, clouds, a starry background, and a moon stencil. The moon stencil I created myself, by die-cutting out a circle from a plastic piece. You can see in the first photo below. I will end up using the positive and negative of this “moon stencil”.

Using the Wendi Vecchi Stay-tion, which is a magnetic board has made working with stencils SO MUCH easier, and more enjoyable. I find myself wanting to stencil more! I start with that and lay down one of the critter cardstocks. Then I use Thermo-Web purple tape to create a clean line and hold the paper in place. Because I knew I was going to do a lot of ink blending above the tape, this will keep any ink from getting where I don’t want it.

Next, I started by inking the grass, using a stencil, blender brush and Hickory Smoke Distress Ink. This particular grass stencil has a mask on the other side, so I slid the stencil down, to mask it and layered on top the sheet of plastic I cut a circle from. I then ink blended the moon with a blender brush and Mustard Seed Distress Ink. I also used a touch of Fossilized Amber Distress Ink to ink the bottom edges of the moon to give it dimension.

If I wanted to cover the moon, so that I could add clouds and or stars like above, I used a piece of Purple Tape, rolled to hold that circle that I die-cut out of plastic over the moon. I then ink blended the clouds using a blender brush and Hickory Smoke Distress Ink. Keeping the moon mask in place, I then placed a starry stencil over it, and ink blended that with Seedless Preserves Distress Ink.

When masking, and layering a one layer card or background like this- plan out what you want your scene to look like and work backwards. Whatever is furthest away, or back in layers is what you would do first. The items that you mask will be in the front or foreground when all is done.

For the witch card:

  • Masked the witch
  • Stenciled in the moon
  • Masked the moon
  • Stencil in the clouds and stars.

For the jack-o-lantern card:

  • Ink blended the grass
  • masked the grass
  • ink blended the moon
  • masked the grass and moon
  • ink blended the whole background with Seedless Preserves, Ripe Persimmon, Wild Honey, Mustard Seed Distress Ink
  • ink blended starry stencil with Black Soot Distress Ink

Finishing touches I did for each card:

  • I stamped, fussy cut out the “BOO” speech bubble, and adhered with a foam dot
  • I added some prisma glitter to some of the stars using a Quickie Glue pen and Prisma Glitter
  • TIP: with the Franken-bear card, my stencil moved a bit when adding the stars, adding glitter on top covers that small mistake up
  • Trimmed down each card to 2.75″ x 4″
  • Die-cut a scalloped frame from various sparkle cardstock for each card. Adhered the card to the frame
  • Stamped a sentiment on each card
  • Using foam, adhered these panels to an A2 card front made out of woodgrain cardstock

Time Saver Tip: If you go through the trouble of cutting a mask, adhere the mask directly to the stamp set so you will be able to use them again. When using masking paper you can use them over and over and over if you are gentle with them.

I hope you find these cards inspiring, and it makes you want to create some Halloween cards too, or experiment with stencils and masking! I have more specific details about the supplies I used over on my site here.

This is my last guest post for this month, just wanted to say a BIG thank you to Evelin for inviting me to share with you guys! This has been so fun!

Posted on 2 Comments

Make Waves

Hello everyone! {creative chick}, Jenn Shurkus here and I am wicked excited to be guest designing for Evelin T Designs this month! For those who don’t know me, I am a part-time mermaid and live on Cape Cod in MA. I am only 5 minutes from the beach, and I spend a lot of time there (brushing up on my mermaid skills 😉 )

So, it was only fitting for my first card to share with you be a mermaid card! Even better that this is a “purr-maid” as I have 3 kitties who keep me company in my studio.

For this card I used the Under the Sea: Merfriends and the Under the Sea: Background stamps. I did some no line watercoloring with Distress Inks on Distress Watercolor Cardstock.

First, I stamped all the images with Antique Linen Distress Ink. Then I proceeded to color them in with various Distress Ink colors. It’s so fun how the stamped line will take on the property of the Distress Ink color that you are painting it with. Some of the items were stamped directly onto the background, while some were stamped on another piece of Distress Watercolor Cardstock and fussy cut out, then added to this underwater scene.

I love creating cards with kitties, and I often color them to look like one of my boys. But this time I decided to color this cutie a soft brown. Shhh… don’t tell my kitties ok? I absolutely LOVE this sentiment “be a mermaid and make waves” – such a fun message of encouragement!

Finally, I also added a touch of chunky glitter here and there a long the sea floor as I often do. I hope you enjoy this card, and it inspires you to create something! I invite you to pop on over to my site today where I am sharing another card with some Evelin T Designs goodies and I will be back next week with some more inspiration! Have a fabulous day!

Posted on Leave a comment

Coffee Survival Juice

Hello! I hope everyone is having a really great week so far! My name is Marie (@marneymakesart) over on Instagram and today I am so honored and happy to be here today as a guest designer for Evelin T Designs! The card I am sharing features the incredibly adorable digital stamp image called “Coffee (n.) Survival Juice” ! Evelin’s designs are so adorable, whimsical, positive , and uplifting! I can’t say enough good things! I decided to create an encouragement card that would be perfect for that one over-worked friend you want to treat to coffee! This adorable little Barista has come to save the day with coffee and sweet treats!! 

Printing Out images on super low opacity

Firstly, I turned the opacity down low before I printed out the digital images on 110 lb card-stock paper. This mimics no line coloring ink. The image is printed out in a light grey tone so that it will blend with the color mediums you choose to use. In this case, I use Polychromos Colored Pencils by Faber Castell to color the images. I printed out more than one of the same image so I could practice and choose which color combination I liked best. Once I was done coloring, I worked on my card base. I choose a dark brown color to mimic the color of coffee and with a scalloped rectangle die, I cut out my base.

using distress ink and stencil

For my background, I really wanted to keep it simple so the little Barista could be the focus. So, I used a brick background stencil and some White distress ink. Afterwards, I cut out a white frame to give the card a simple white border. I also used some vintage photo distress ink to add a coffee like tint to the sides of my border. Then the fun part was just positioning and playing around with my image. I used a speech bubble die and a “hang in there” sentiment of encouragement. I also used letter dies to create “it’s Coffee Time!!” Sentiment! I love how letter dies look like you have done some embossing!

Lastly, I finished off my cards with some charming star accents of white and gold to compliment the word “Coffee”. I am so beyond happy with how my card turned out and I can’t wait to mail this to a friend or loved one that needs a little pick me up! It’s so easy to be inspired to create cards when you have such adorable images!!!

Processed with MOLDIV

I would like to thank you for stopping by and thank you Evelin for the opportunity to share and be a part of such a wonderful community of inspirational and talented creators! Have an amazing day!!!

Posted on Leave a comment

Be Still and Know | Guest Designer Mayra

Hello and happy Wednesday everyone!! Mayra here from Mayras Designs. I am so happy to be back with another post as a guest designer for the wonderful Evelin T Designs Digital Stamps. This week, I created a set of three cards to share with you using the super beautiful Floral Banner digital stamp. I loved coloring these images. On one of the images, I printed it with a lighter outline to give the no-line coloring appearance. This digital stamp comes with several sentiments and I chose the sentiment ‘Be Still and Know’.

To color the images, I used Copic markers. Firstly, to color the green areas, I used two different tones of greens. On some of the leaves, I used G29, YG67, YG17, YG25, and YG01. As for the olive green, I used BG90, YG91, BG93, YG99, YG97, and BG96. To achieve the layered burgundy color, I used RV34, RV69, R89, R59, RV66, and RV95. Lastly, for the pink/peach, R32, R30, and R00 was used.

For the base of my cards, I used Distress Oxide ink to add color to them. The colors I used are Speckled Egg and Tumbled Glass. I then added a couple of white splatters to each of them. To finish my cards, I added foam tape to the back of each colored image and adhered it to them to the card bases.

I hope you enjoy the cards I created and feel inspired to create. Thank you so much for stopping by. I hope you each have a wonderful and blessed day. I would also love to thank Evelin for inviting me to be a guest designer and the opportunity to create with her gorgeous images.

Posted on Leave a comment

Happy Birthday | Guest Designer Mayra

Hello and happy Wednesday everyone! I am so excited!! Mayra here with you today. It is such a huge honor and blessing to be here with you,  I am guest designing Evelin T Designs Digital images. YAY!!! I fell in love with her images. They are meaningful and beautiful. 

For my card today, I used the lovely Sending Joy digital stamp.

This is such an amazing set!!

It comes with several sentiments: Happy Father’s Day, Happy Mother’s Day, 
Happy Birthday, Sending Joy, Thank You, and Smile.

For my card, I used the Happy Birthday sentiment. I colored my images using Copic markers.

I used YG00, YG01, YG03, YG23, YG17, G94, and G99 for the leaves. For the purple areas, I used V09, V04, V01, V15, and B60. For the deeper purples,  I used B69, B66, B63, V20, and B60.

I then added Distress Oxide Inks to a piece of Bristol Smooth Cardstock. I used Blueprint Sketch, Wilted Violet, and Seedless Preserves. I then added a couple of white splatters to it to finish it.

I hope you like the card I created to share with you today. Thank you so much for taking the time to stop by!! Hoping you have a blessed and wonderful day!!

Please feel welcome to click here if you would like to see more of her wonderful products:

*This post contains affiliate links

Posted on 1 Comment

Guest Designer | Noga Shefer

Hi crafty friends, I am so happy to be guest designing again today for the amazing Evelin T Designs !  

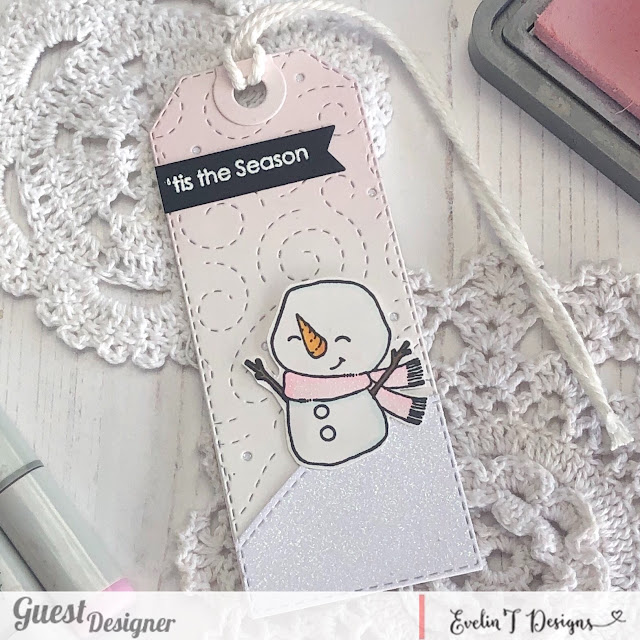
I made another unique tag for this GD.

product tag, bookmark by guest designer Noga Shafer

My tag featuring the adorable Good Tidings to You. This set is just perfect addition to your stash!  To make this tag, I die cut a piece of Bristol smoosh using a tag die. The  background was created by blending spun sugar distress oxide ink and swirls die.
I glued “the slope” using white glitter cardstock.  

Next, I stamped and colored the adorable image using copic markers and glued it to my tag with foam tape.

Next, I stamped a greeting from this set using white powder and heat embossed it on black banner and the tag is ready!

I hope you enjoy the project I created and feel inspired to create!

Have a wonderful day! 

Noga

Posted on Leave a comment

Guest Designer | Noga Shefer

Hi crafty friends, I am so happy to be guest designing again today for the amazing  Evelin T Designs ! I am really excited about it.  

I made a unique tag for this GD.

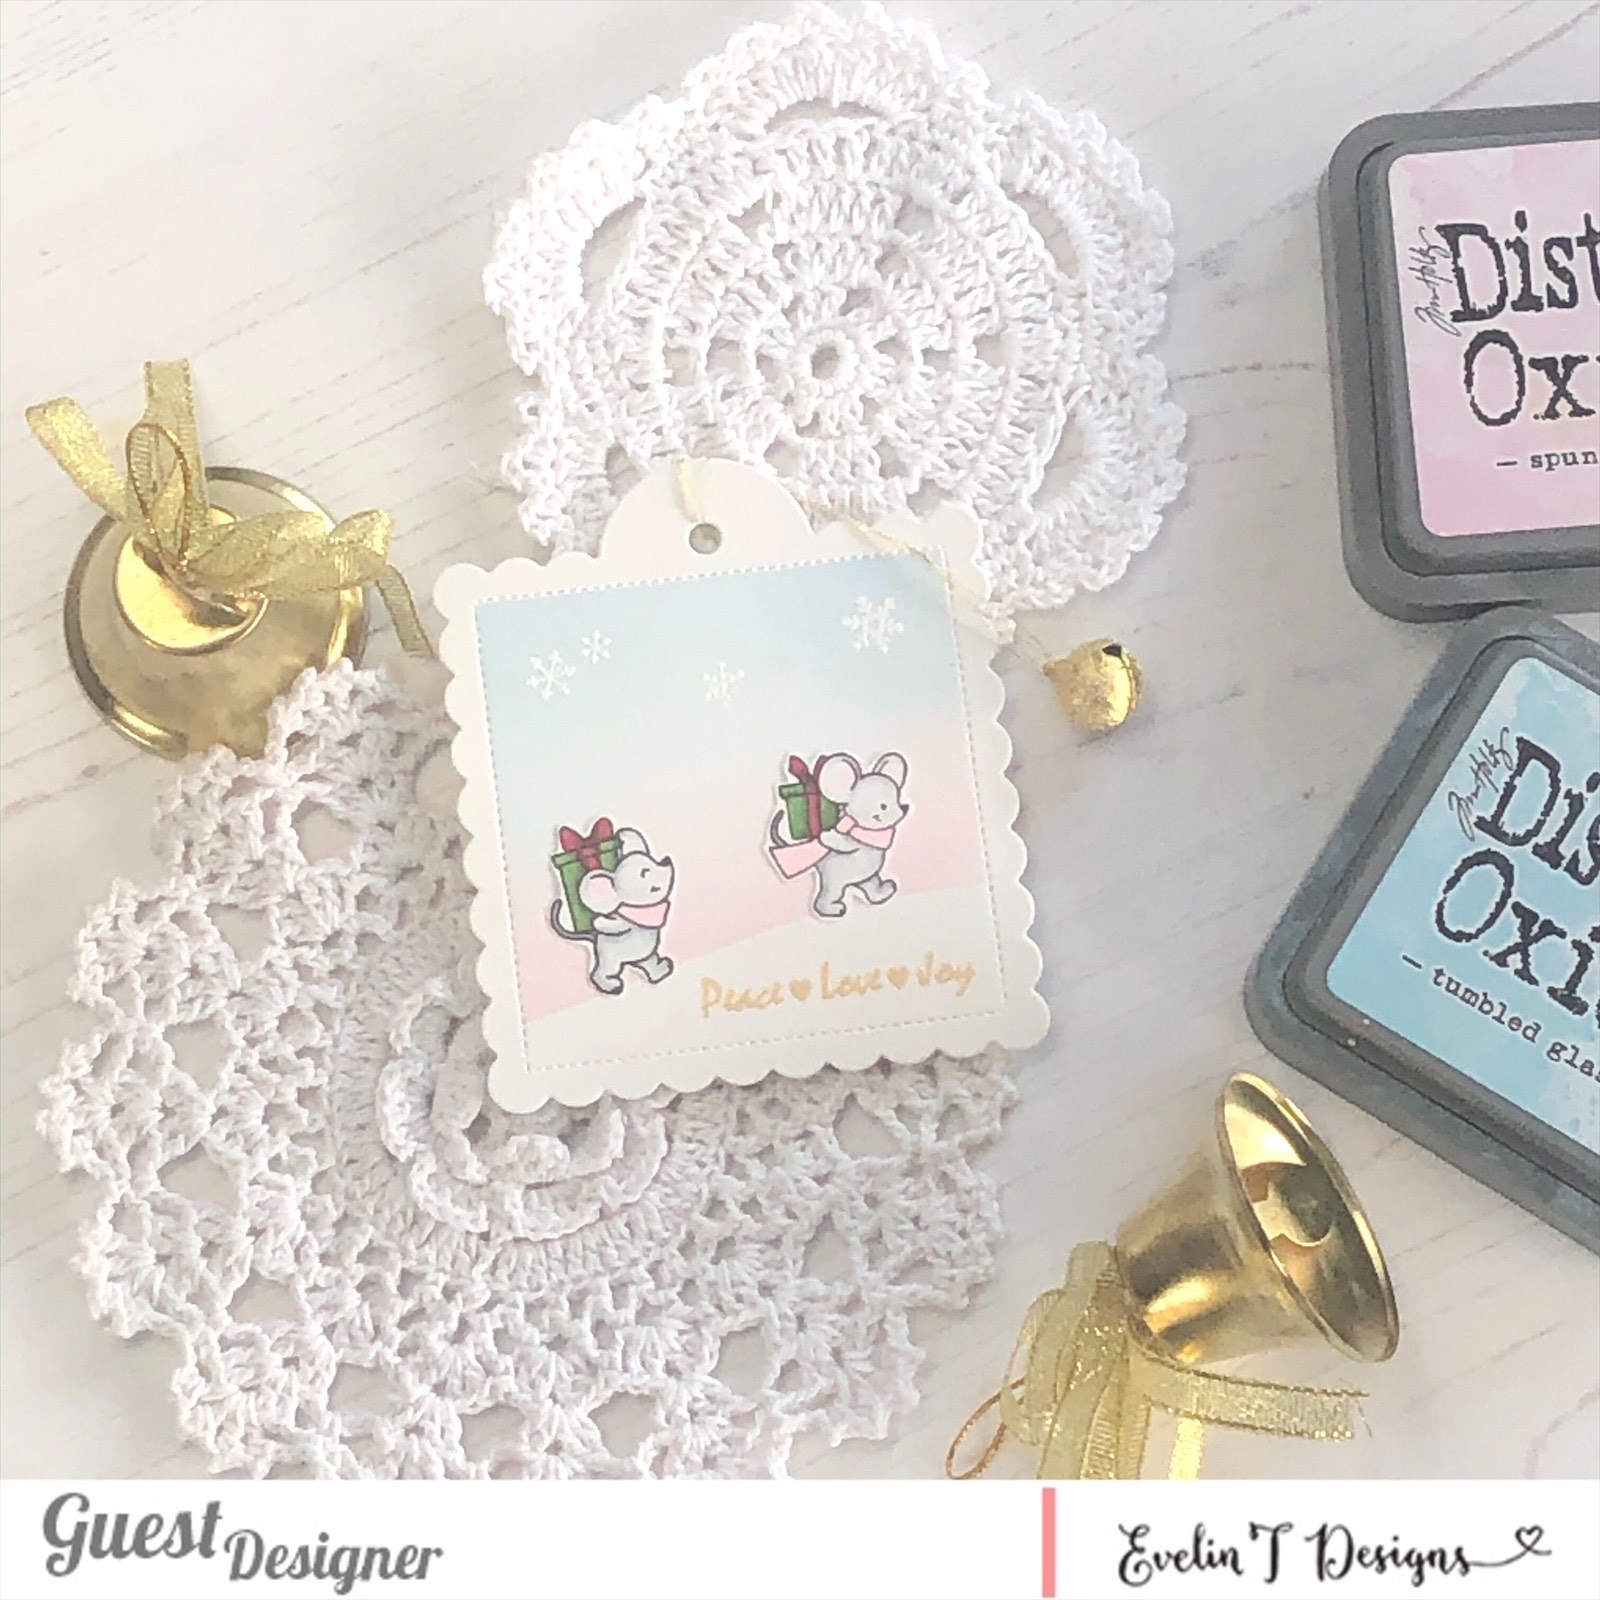
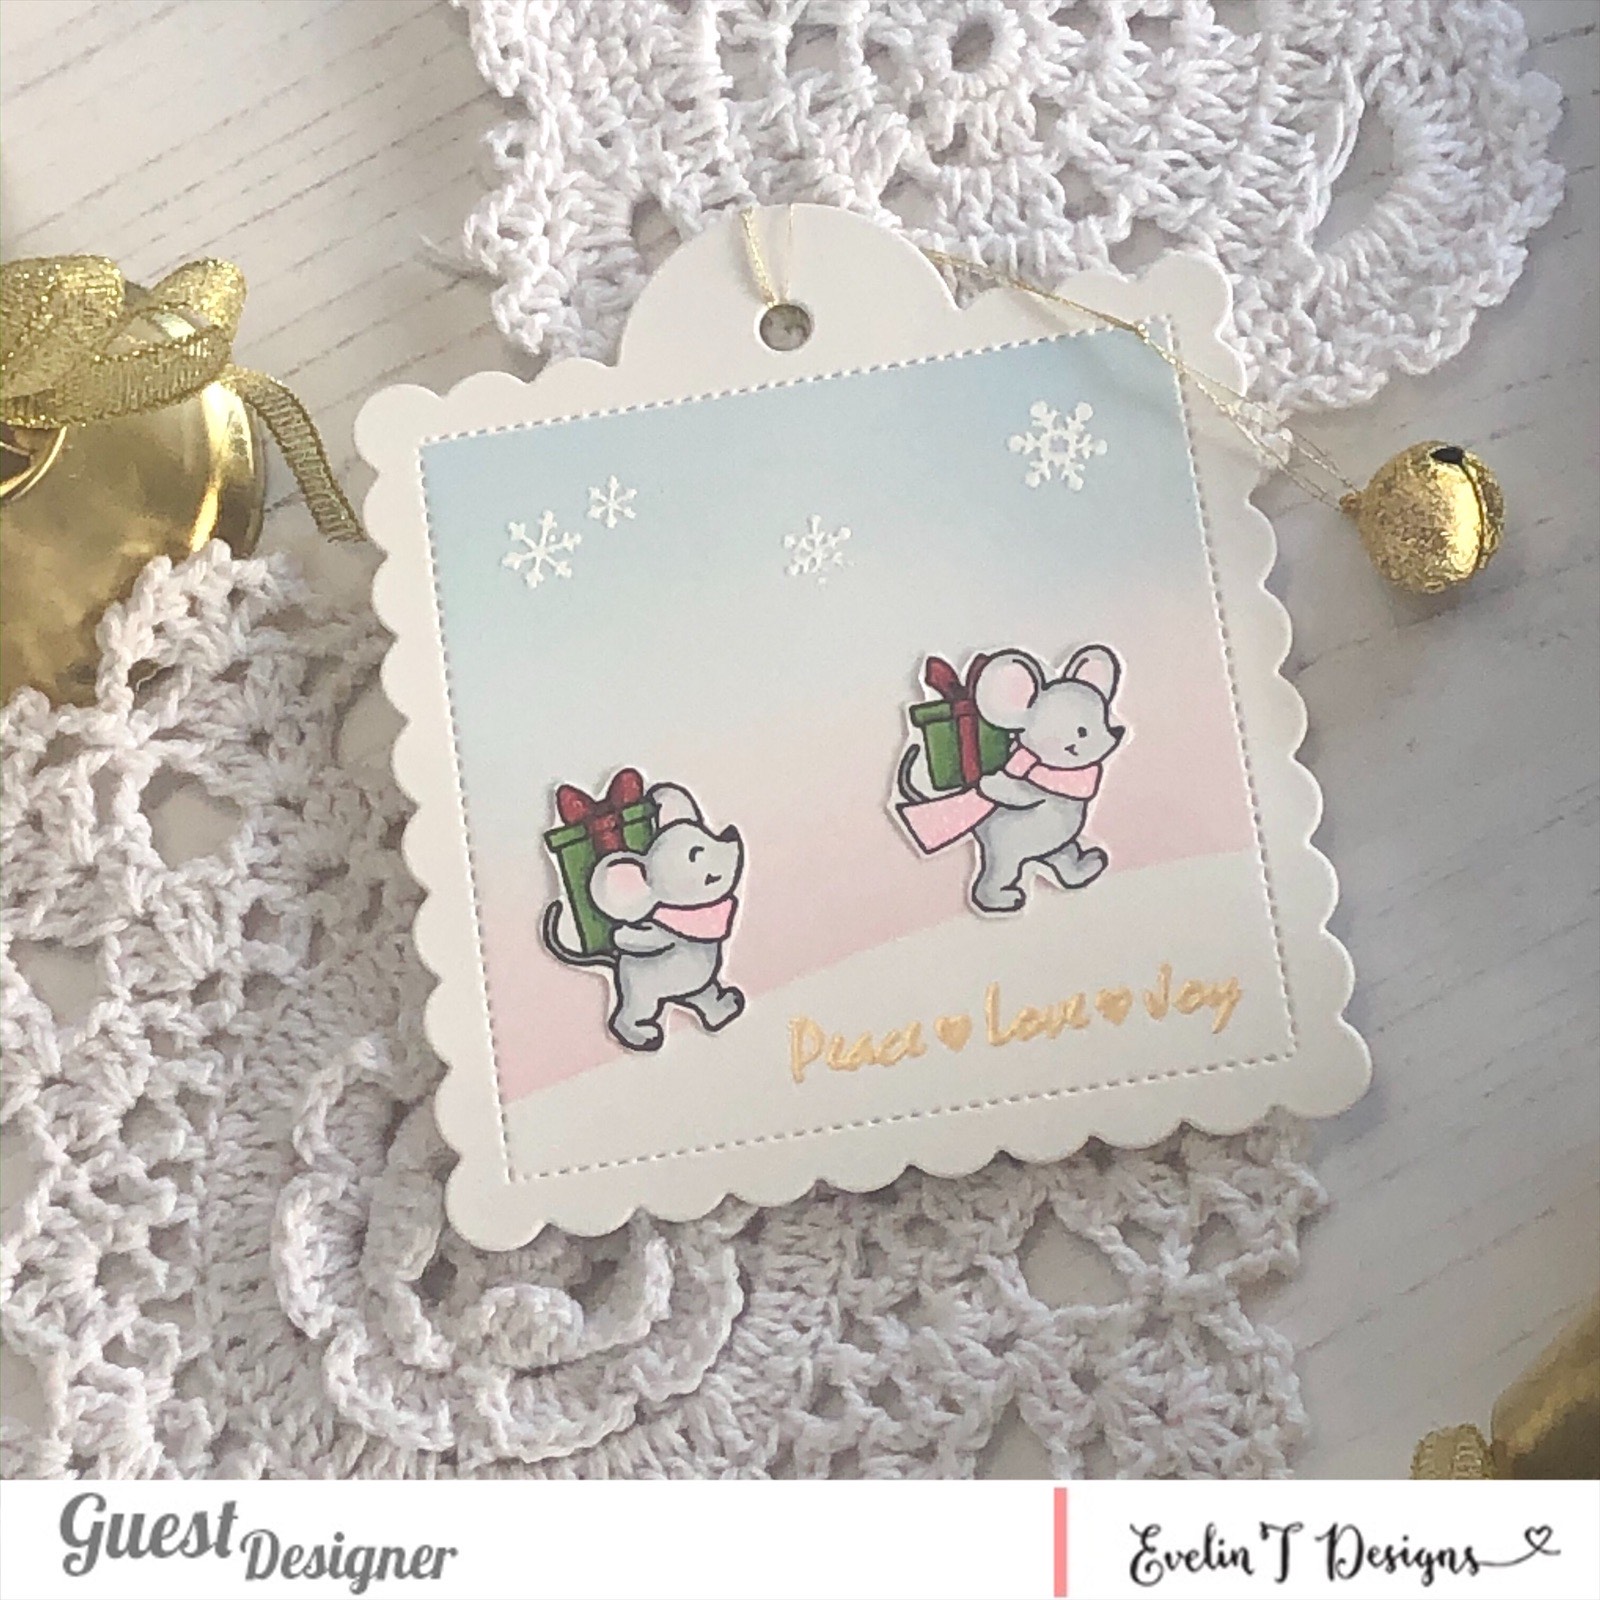
My tag features the adorable stamp set called Good Tidings to You. This set is just perfect addition to your stash! To make this tag, I die cut a piece of Bristol smoosh using a tag die.

To make the background, I masked off by blending spun sugar and tumbled glass distress oxide inks. Next, I stamped and colored the adorable images using copic markers. After that, I stamped a greeting from this set using gold powder and heat-embossed it.

As a final touch I heat embossed a few snowflakes using white powder.

I hope you enjoy the project I created and feel inspired to create!

Have a wonderful day! Noga

Posted on Leave a comment

Guest Designer: Patricia Roebuck | Fun in the Snow Cards | Video

Hi Everyone!  This is my last post as a guest here on the Evelin T Designs blog.  Thank you so much Evelin for having me and to everyone for letting share!  The holidays are coming quickly.  I thought of a background using the Fun in the Snow stamp set with watercolors that is not only fun and whimsical but quick to mass produce!  And if you have a little extra time to get creative with your holiday cards, I’ll share another card using the same stamp set.  I also have a video to share how these cards came together at the end of this post.

I love the playfulness of the Fun in the Snow stamp set.  Each one of these images shows personality and movement.  Perfect for a background.  I created a background with the adorable and silly penguins and the beautiful bear gracefully skating along.  All I did was stamp several card panels with Staz On ink, then added messy watercoloring on top of them.  I created four cards using different cardstock panels under each one before adding to my card base.  You can change the look of them by using different cardstock colors.  To finish them, I added some Nuvo Drops.

For this next card, I did not use a card panel.  This is a single layered card base, except for the silver cardstock die cut frame I adhered around it.  Before adhering that though, I stamped this silly penguin  in black ink.  Then created a mask for him to create a wintery swirl to go along with the motion of him gliding along the ice.

You can see more on the video how this came together.  I placed the mask over the penguin, then used Nuvo Drops and Glitter to create swirls using a popsicle stick.  Lifted the mask after it dried a bit, and colored the penguin with pencils.

For the sentiment, I stamped the floral images from the stamp set to peek under my die cut silver frame to bring attention to my stamped sentiment at the top.  I finished this cutie with gems and sequins.

This card was not complicated to make, but definitely has a few more steps with the masking, coloring and the die cut frame, but still simple enough you could mass produce a set to give out for the holidays.  Thank you so much again Evelin for having me and to everyone for letting me share!  You can watch the video below to see how these came together or watch it in HD on my YouTube Channel here.
Posted on 1 Comment

Guest Designer: Patricia Roebuck | TN | Video

Hello Everyone!  So thankful to be here with you all and especially my talented friend, Evelin!  I’ve met Evelin in California at the CHA shows and have been on teams with her before.  I always knew she would succeed with her amazing talent!  My main love is memory keeping, but I do love to make cards and do mixed media.  I dabble in a little of everything.  But before I actually make anything, I really enjoy tinkering and playing with product and then see where the creativity goes.  So for today’s post, I will share some of that tinkering with a Traveler’s Notebook I created inspired by the products.

The Coffee Art stamp set really had me inspired to create this Traveler’s Notebook to document small happy moments.  I started by measuring, trimming and then stamping some of the images using black ink onto grey cardstock.  For the inside pages I used a Strathmore Sketch Paper Pad.  The reason for this paper, is I wanted the pages to be thin.  I can then either create on top of the pages, or my favorite is to work off the page, and then adhere my creation on top.  Will share more of that in a bit.  I also have a video showing how the inside pages came together, you can find at the end of this post.

For my first inside page, I wanted something there but very simple.  So I used a stencil and inks to create a blended ombre look, then stamped some of the leaf images from All Hallow’s Cuteness and Coffee Art in shades of green ink.  I finished it with a chipboard piece in the center.

Now for my first full page spread in my album, I was inspired by the Coffee Art stamp set again to use with this photo, which happens to have a coffee cup 😉

Because my inside pages are thin, I could see the ink from the first inside page showing through.  To Fix this, I either adhere two pages together, but in this case, I wanted to work off-the page first and then adhere to the TN page.  I first started by stamping the leaves from the All Hallow’s Cuteness stamp set, then used a ruler to draw lines.  I used this to type my journaling.

I stamped and colored a good bit before creating this project.  The little toadstools I stamped and watercolored from the All Hallow’s Cuteness were the perfect touch to this woodsy, whimsical memory.  To add a little more texture, I used a light green ink to stamp the circle heart image from the Coffee Art stamp set.  I finished that page with washi tape, die cuts and puffy stickers.

For the right side, I wanted to show more of the cup images, so I created a repetitive pattern on a separate piece of the same paper.  Then stamped in the ‘Hallo There!’ sentiment from the same stamp set.  I am choosing the green and the orange inks to complement my photo, the colored images and die cuts I used on the left.

I finished this side with another die cut which covered up an imperfect stamped image I did (oops), and then finished with enamel dots.  The die cut also helps to balance with the left side.  Then I adhered both of these pages onto the inside pages of my album.

The sentiment ‘coffee + you = happiness’ inspired me to document me and my daughter at Starbucks with her new phone, taking and sharing her first selfie photo for my next spread in my TN album.  I also kind of love the bear and the snowman marshmallow images from the Coffee Art stamp set.  The bear went perfectly with my daughter’s fuzzy headband too 😉

I worked directly on the pages of the album to ink a starburst that repeats the image in the top left from the photo.  I wanted the sentiment to be the focal in between the stamped images.

I typed and then detail cut and stitched labels together to add my journaling.

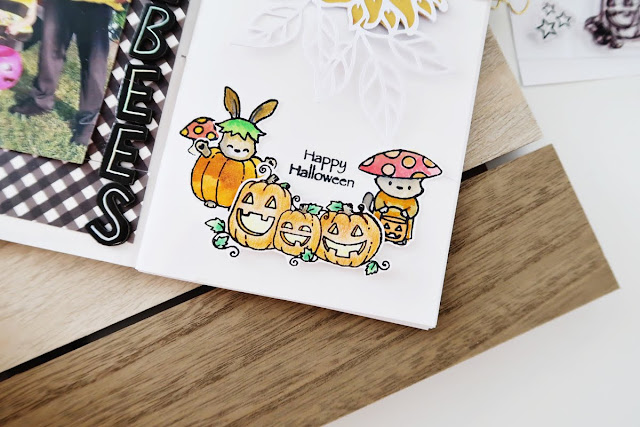
For my last page to share today in this Traveler’s Notebook, I created a Halloween page.  I had lots of the Halloween images stamped and colored as well.  I used a cut file from Citrus Twist Kits that went perfectly with my photo but also great little spots for those adorable, little images from the It’s Boo-Tastic! and All Hallow’s Cuteness stamp sets.

All of the images here were colored with watercolors, except the three jack-o-lanterns.  I love how well the mixed together to create a fun cluster with the stamped ‘Happy Halloween’ right in between them.

I used foam alpha stickers and enamel dots to finish this spread.

I did not have a plan for each one of these pages.  But I love how the inspiration comes as you stamp and color.  Hope this inspires you to try your stamped images in your memory keeping or gives you some ideas for your next card!  I will be back in November to share cards as a guest again here with Evelin T Designs!

I do have a video showing how these pages came together.  You can watch it in HD on my YouTube Channel here or below.  Thank you so much for letting me share and guest!