Posted on Leave a comment

Happy Birthday Critters

 Hello my fabulous friends!

My name is Kassi Hulet, and I’m so excited to be guest designing here this month!

If you are familiar with my work, you may have noticed that I love watercoloring animals and flowers using the no line technique.  That love made this image absolutely perfect for me… 

This is the adorable  Sending Joy digital stamp. Isn’t it super sweet?!

I knew I wanted to  do some no line coloring with this image, and I also wanted to do some foiling… to do this, I created two layers of the image in photoshop.  The first layer I set the opacity to about 12% (this creates the very light lines that seem to disappear once colored. For the second layer, I selected just the words, and left that layer at 100% opacity so the ink would nice and dark there.

I printed onto some Bristol Smooth cardstock using a laser printer, and colored the whole piece using Zig Clean Color markers. I love these adorable animals and wanted to keep them super soft and sweet… 

You can obviously stop here, and it looks fabulous, but I wanted to add just a little extra pop…

I ran the image through my laminator with a little gold foil… Where the toner from the printer is full strength, the foil sticks beautifully, and where the toner is only at 12%, it is too weak to foil.  This makes selective foiling like this a breeze! 

Be sure to check out all the other fabulous clear and digi stamps over at Evelin T Designs! I’ll be back later this month with another project featuring another one of my favorite Evelin T Designs images!

See you soon!

~Kassi

Posted on Leave a comment

Fun-Loving Animals

Hello everyone! It’s Anita here with you today and I’m so excited to be guest designing for Evelin T Designs! I have two cards to share with you.

Tis’ the Season SlimLine Card

For my first card I used the adorable Fun In The Snow stamp set. This set includes lots of sweet ice-skating penguins and bears, making it perfect for both Christmas and Winter cards.

I made a slimline card that measures 3.5″ x 8.5″. First, I sponged the bristol cardstock with Blueprint Sketch, Chipped Sapphire, and Black Soot distress inks to create a night sky. Then, I splattered it with thinned acrylic paint to create a snowy effect and adhered the cardstock to my base. Next, I cut a snowy slope from white cardstock, inked the top with Blueprint Sketch, and adhered that to my card.

To create the pond, I cut some white cardstock and added some Peacock Feathers and Blueprint Sketch distress inks to give it a frosty look. I used foam tape to adhere the pond to my card so as to create added dimension. Next, I colored the skaters with copics and used a black glaze pen to darken their eyes and noses. To add polka-dots and stripes to the scarves and earmuffs, I used a white gel pen. Finally, I adhered the skaters with foam tape, along with a sentiment from the stamp set to complete the card.

The copics I used for the bears are BV20, BG70, E01, and E000. For the penguins, the colors I used are BV20, BG70, C7, C5, C3, and C1. Lastly, for the scarves, hats, boots, and earmuffs, I used YG17, YG03, YG01, B29, B26, B24, B21, BG07, BG05, BG02, B000, R46, R37, and R35.

Take a Leap of Faith Card

For my second card, I used the fun Take A Leap Of Faith stamp set. I just love the cute animals jumping on the trampoline!

Firstly, I stenciled clouds on the front of my card with distress ink to create the sky background. Next, I sponged Mowed Lawn distress ink on bristol cardstock, cut it with a grass die, and splattered it with water to create the splattered effect on the grass. Once dry, I stamped one of the sentiments from the stamp set and adhered the grass with foam tape. After that, I colored the stamped images with copics before adhering them with foam tape also.

The copics I used for the trampoline are C7, C5, C3, and C1. For the bunny, I used E55, E53, E51, E50, E01, E000, and R30. To complete the card, I used W3, W1, W0, and R30 for the cat and BV20 and BG70 to shade the clouds.

I hope I’ve inspired you to get inky today!

Hugs, Anita

Posted on Leave a comment

Memory Planner with Positivi-Tea

Positivi-Tea, Best Friends Fur-Ever!, Life is Beautiful, Take a Leap of Faith, Evelin T Designs, Memory Planner, Patricia Roebuck

Hello Evelin T Designs Friends! I am really enjoying doing Memory Planning as a way to capture the routines of our lives. I find Evelin T Designs stamps a great way to create and use my own images over and over again whether by stamping and fussy cutting or stamping directly onto my planner. Stamps were always my go-to for getting so much out them than just one use! So here is a look at how this spread came together.

Positivi-Tea, Best Friends Fur-Ever!, Life is Beautiful, Take a Leap of Faith, Evelin T Designs, Memory Planner, Patricia Roebuck

Firstly, I take a look at the photos for the week and then decide which to print larger and which to print smaller. Then, I start adding the stamping, die cuts and stickers after I adhere the photos to my pages.

Positivi-Tea, Best Friends Fur-Ever!, Life is Beautiful, Take a Leap of Faith, Evelin T Designs, Memory Planner, Patricia Roebuck

I always have extra stamped and colored images. All I had to do was to add the images from the Positivi-Tea, Best Friends Fur-Ever!, Life is Beautiful, Take a Leap of Faith stamp sets I used to where they would help tell the story and fill in my collage. The sentiments are perfect for adding to die cuts or directly to my planner too. The fonts and sayings go so well with the style of my planner.

Positivi-Tea, Best Friends Fur-Ever!, Life is Beautiful, Take a Leap of Faith, Evelin T Designs, Memory Planner, Patricia Roebuck

I needed a few more stamped and colored images for this layout. But it was easy to do. I knew exactly which ones I needed. The coloring was quick since I already had my colored laid out. I love the details the stamps add. My favorite little cluster is the ‘Sunday Ride’ with the Alpha Blocks set, the ‘Be You’ sentiment from Life is Beautiful, and the leftover stamped and colored cloud from Take a Leap of Faith at the bottom.

Positivi-Tea, Best Friends Fur-Ever!, Life is Beautiful, Take a Leap of Faith, Evelin T Designs, Memory Planner, Patricia Roebuck

Thank you so much for stopping by!! I hope this gives you inspiration to pull out your leftover stamped and colored images and use them on our next project whether memory planning or a card!

Posted on 1 Comment

Cute Is Just My Cover

Hello Crafty Friends! I hope everyone is having a fantastic Wednesday! It’s Marie (@marneymakesart) back again for another card share! Today I am very excited to share my completed card using Evelin’s digital stamp called “Cute Is Just My Cover” I fell so in love with this image because it has everything I love… Adorable Peek a boo bunnies, mushrooms, and lush greenery! Taking all this whimsical cuteness, I decided to make a simple hello card against a night time backdrop. First off, I printed my digital images on low opacity so I could achieve the “no line coloring” look.

Colored Image Vs. Non colored image printed with low opacity

coloring this image was so much fun! When working with digital images, color pencils are my favorite! My preferred pencils are PolyChromos By Faber-Castell. They are very creamy in a non waxy way and blend beautifully. I had a lot of room to work within the mushroom image so I wrote the word Hello Inside it as my main sentiment and colored it in as I would the mushroom dots .

Processed with MOLDIV

When I was brainstorming how I would put together my card, I wanted to have a scene that was rich with vibrant greens! That’s when I remembered that I had Evelin’s Stamp set called “Best Friends Fur-ever” In that set there is an image of lush leaves and bushes that Was absolutely perfect for my scene! I stamped it out twice using No line coloring ink. Now my main mushroom image would be surrounded by green on both sides complimenting the red. For the night time background, I used Distress Oxide inks. These inks are an absolute staple in every craft stash! Ink colors used include: dusty concord, seedless preserves, mowed lawn, forest moss, and chipped sapphire.

Processed with MOLDIV
Combining digital with stamped images

When I completed my scene, I added some gold and white stars to give it that starry sky finishing touch. I absolutely love how this card turned out! I can’t wait to send some snail mail soon!!

Cute is just my Cover
Processed with MOLDIV

Thank you so much for stopping by! I hope I have inspired you just as so many have inspired me! Let’s keep this crafty , artistic expressions circle going! Love and Peace! Marie 🙂

Posted on 1 Comment

A Halloween Story

I’m so excited to share this card with you because it turned out exactly how I had hoped it would! I had this lovely idea of a girl reading a spooky story and her interpretation of the story is brought to life in the vision above her.

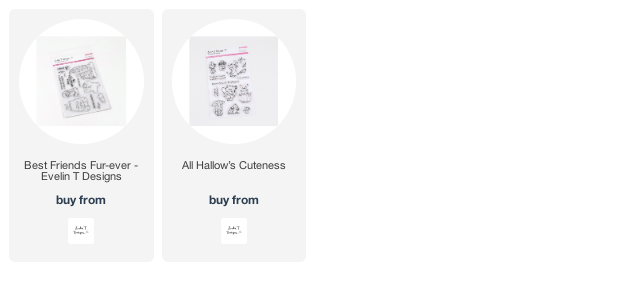
I made this card by stamping images from Best Friends Fur-Ever and All Hallow’s Cuteness, then creating masks for them. I used a retired Quotables Die (alternates are listed on my blog) to create the separation between reality and fantasy. Then I used a Cloud Stencil to sponge the background.

After the background was completed, I sprayed water droplets on the top panel and removed the masks. Then I watercoloured the images with distress inks and adhered the two panels to the card base. To add mystique, I used Iridescent Stars on both panels.

For a full supply list, please visit my blog. Thanks so much for stopping by!

Supplies:

Posted on 2 Comments

Narwhal HELLO…

Happy Monday Evelin T Designs friends. Annette Allen here with you on this fine Monday and I am sharing a card created using the newly released UNDER THE SEA: NARWHAL stamp set. Don’t you just love the new release?

I colored these adorable images with Copic Sketch markers. For the background I used a background created using Ranger alcohol inks and water. With a couple of fun die cuts I am ready to put my card together.

Piecing the card together is sometimes the fun part. I adhered the colorful background on my card base but first added some pretty designer paper on the sides. I wanted the pink to stand out just a bit more so this was my solution. Next I added these cute die cuts and finishing up with my colored images from the UNDER THE SEA: NARWHAL stamp set. I used foam adhesives to give it some dimension.

You can get your crafty hands on new release HERE. Make sure to check out all the inspiration from the sneak peeks we did at the beginning of the month.

Have a wonderful day.

Thanks for stopping by!

Posted on Leave a comment

Welcome to Evelin T Designs

Evelin Tee
Evelin Tee

Hi and Welcome to the first post here on Evelin T Designs! I’m Evelin Tee, designer and owner of Evelin T Designs and I am so glad you are here.   I grew up in sunny Malaysia and moved to Southern California with my husband in 2012. We have a darling boy and are expecting another baby boy this May 18th. Drawing and creating has always been close to my heart and it has truly been a blessing that I was given the opportunity to design stamp sets for a few amazing companies since 2014.

With the encouragement and support from my husband and a dear friend whom I also call a mentor, I finally made the decision to launch my designs through my own company.  Our mission is to “bring Joy through stamping”. Personally, stamping has brought me much joy since I discovered card making back in 2008 during my time in the corporate world. Through card making, I have ‘met’ and developed some amazing friendships with crafters around the world which in turn, opened up opportunities for me to design stamp sets and now, designing for my own company.

And as for our logo, it is handwritten by me and it’s a way of reflecting how I would like to be as personal as I can with my products to all of you, throughout the whole process of it all. To me, this is a very personal and intimate journey and I am so glad I get to share it with all of you.

Our Logo

Join us over the next week as we sneak more pics in preparation for our first release. Our store will go live Monday, May 6th at 11am EST. In the meantime, we would love for you to connect with us…

  • Join our mailing list so that we can keep you in the loop of our next release and share inspirations! Sign-up form is at the top of the blog.
  • Follow us on Instagram – our handle is @evelintdesigns
  • Connect with us on Facebook!
  • Follow my kiddo and I on YouTube for crafty inspirations

I just want to say a huge THANK YOU again to all of you for your support and encouragement. This is a labor of love and I am so glad that you are here to see this dream come to fruition. For those of you that are new, I am so excited that you are here. 

Love,
Evelin