Posted on 2 Comments

Wishing you a Magical & Blissful Holiday!

Hello and Happy Monday! It’s Amy here with a bit of holiday inspiration. I’m starting to gear up for the holiday’s, how about you? This year I really want to get my cards out during Thanksgiving weekend so that I don’t have to stress in December.

Today’s card combines Good Tidings to You and Warm Winter Wishes:

If you’ve been following me, you know that I’ve been really loving the pastel palette. These images were super quick for me to color.

I love how the sets are easy to mix and match. This particular design is super postal friendly even though it has several layers of cardstock.

I hope you have a fabulous week!

Posted on 2 Comments

You Are So Sweet

Happy Monday! I was aiming to make an Easter card but when it came to the sentiment and trying to figure out how to create an Easter sentiment with non-Easter words, I scrapped that idea in favour of all-things-bunny.

I used the bundled up bunny from Warm Winter Wishes (also available at EH | SSS), the bookworm bunny from Reading Buddies (also available at EH | SSS), and both the coffee-loving and snacking bunnies from Coffee Loving Critters (also available at EH | SSS).

I coloured all of the bunnies with Copic markers, fussy cut them and set them aside to create the background. I used masking paper, life changing blending brushes, and abandoned coral and tumbled glass distress inks to create the ground and sky.

Then I stamped the sentiment from Coffee Loving Critters (also available at EH | SSS) with three shades of ink, adding a second heart to balance out the colours. To finish, I adhered the bunnies to the card base with three sizes of glue dots.

Please visit my blog for a full supply list. Thanks so much for stopping by!

Posted on 1 Comment

Coffee Love…

Happy Hello Evelin T. Design friends… Annette Allen here with you today and I am getting crafty with Evelin T. Designs: Coffee Art, Coffee Loving Critters and Warm Winter Wishes stamp set. Mixing it all up today.

I am sharing two cards today, so lets get started.

This first card was created using the Coffee Art stamp set.

I created a colorful background using Altenew: Classy Stripes stencil and Amy Tangerine Actetate. I used Ranger Oxide inks: Spun Sugar, Scattered Straw, Tumbled Glass and Shaded Lilac. This fun image is colored with Copic sketch markers. I used some silver glitter paper to give it a little shine.

I used Scotch foam tape to give the image some dimension. I always like my cards to have a little pop. Foam tape is just fun…. don’t you think?

This next card was created using the Coffee Loving Critters and Warm Winter Wishes stamp sets.

The background was created using the same stencil and Ranger Oxide inks: Peacock Feathers, Cracked Pistachio Picked Raspberry and Tumbled Glass. I went with a simple background but really oh so fun. I love stripes and well with all this color it is right up my alley.

The images are all colored with Copic Sketch markers and added to the card using Scotch foam adhesives.  More dimension….

You can get all these fun stamp sets on the Evelin T. Designs store right HERE, plus much much more. AND more to come.

Thanks for stopping by today.
Have a fantastic week!

Posted on 4 Comments

Winter Fun…

Happy New Year Evelin T. Designs friends… Annette Allen here with you today and I am sharing two Winter Fun cards that I created using Evelin T. Designs: Fun in the Snow, Good Tidings to You and Warm Winter Wishes stamp sets. 

Don’t you just love when you start to create a card and well you have more then one idea so you just go with it. So today I am sharing two cards just because these ice skaters are just too cute and fun to create with.

I stenciled the background and layered it with a sunburst die. The image is colored with Copic sketch markers. The image just comes to life with color… don’t you think?

I used some winter themed dies to create these fun backgrounds for these adorable ice skaters. Minimal coloring and and finishing up with stamping these fun sentiments. I added some dimension to the image and the sentiment using foam adhesives.    As you can see all the Evelin T. Designs stamps mixing very well together. So go crazy and have creating.   

Thanks for stopping by today.
Many Blessing for this New Year.

Posted on 6 Comments

Fun in the Snow Trio

Hello and Happy Monday!  It’s Amy here with a winter card trio.  I used the images from the Fun in the Snow set and teamed them up with a sentiment from Warm Winter Wishes.

My intention wasn’t to design three cards but since I had all those cute images from the Fun in the Snow set, I decided to go ahead and use them all up.

They were super quick to put together since they’re 4.25 x 4.25 with minimal copic coloring.  I used the same overall design for each of them.

I used a pool die cut from my stash to create their ice skating rink.  Skating by starlight, sounds fun to me!

The New Years is almost here, can you believe it?  I wish you all joy, love and happiness!

Posted on Leave a comment

Christmas Window Card

Hello! Heather Hoffman here this morning with a fun card to share with you using All is Calm and Warm Winter Wishes to create this this fun Christmas window scene! I thought it would be fun to take a portion of the scene from All is Calm and make it mimic looking into a window as a family decorates their Christmas tree – I love how it came out!

I started off by die cutting a window from white cardstock using a Simon Says Stamp die called Stitched Window Frame. I then stamped the part of the image I wanted to use on a small piece of white cardstock, then trimmed it down to fit just right behind my window.

Once I had that decided, I went ahead and colored the image in with Copic markers – love this cute little snippet of the image!

I then mounted the window over that panel with foam adhesive, then mounted it on my kraft cardbase. Can you see the bit of a 3 dimensional look it gives?

After that it was simply a matter of stamping some sentiments underneath. I used a combination of sentiments from All is Calm and Warm Winter Wishes – the perfect finishing touch!

Thanks so much for stopping by today! Have a wonderful day!!!

Posted on 4 Comments

Good Tidings to You Frameless Shaker Snowman Card

Hello Friends! 
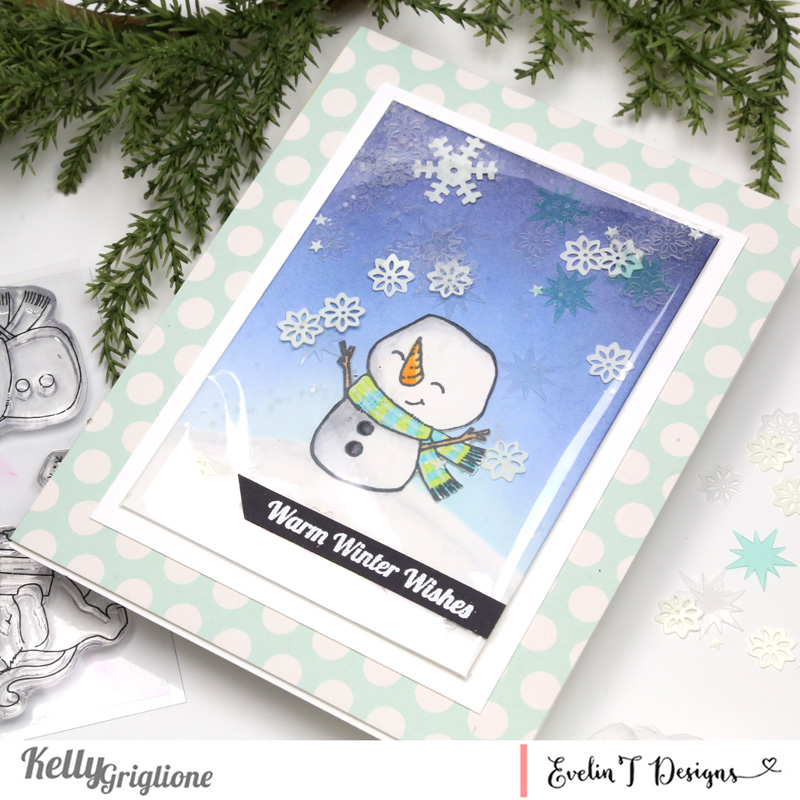
Kelly Griglione here to share a really fun card featuring the darling snowman from 
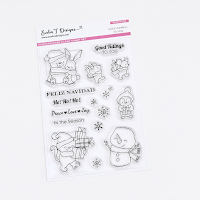
Good Tidings to You using a new-to-me technique that I recently saw Ilda Dias use … frameless shaker cards! Although I love how shakers look, I was never really a fan of making them because I didn’t like using all of that foam tape. Plus the bulk made it difficult to mail.

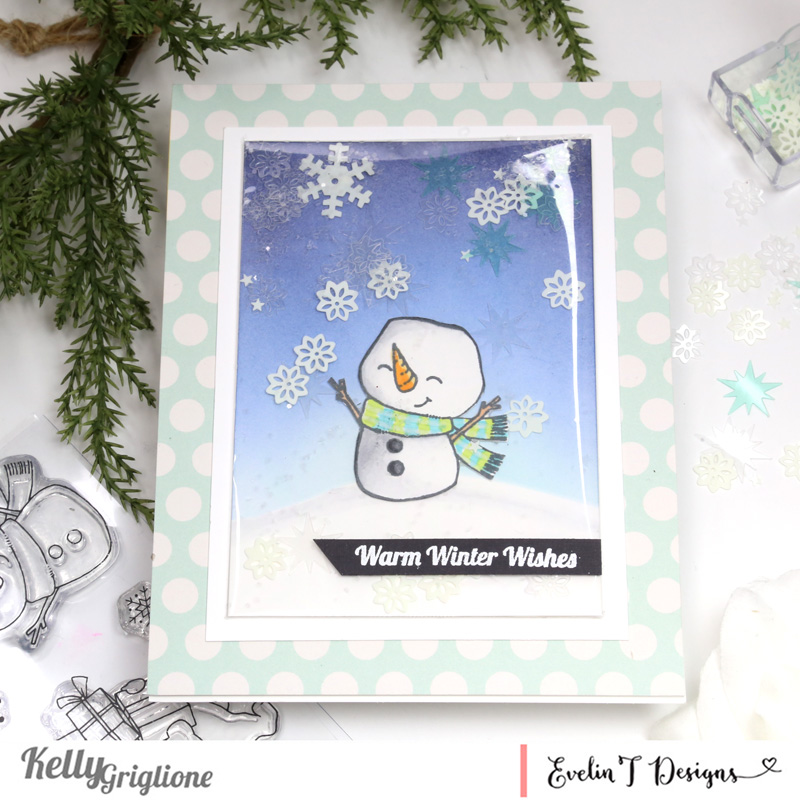
With this style of shaker card though, you skip the foam tape and bulk. Instead, wrap clear mylar, acetate, packaging, report covers, cellophane, basically anything you can find that’s clear, around the area you want to shake. You could make the entire card a shaker if you wanted to! Obviously the thicker the material you use, the better your card will hold up.

I grabbed one of my husband’s clear comic book bags and cut a piece that would fit around my panel.  Then I added the shaker elements to my panel, folded the sides of the clear mylar back behind the panel, and secured all the sides with tape.  I like that the snowflakes move around plenty when you shake it, but it also tends to hold the shaker contents in place. It’s a good balance. Love how the snowflakes float around the darling snowman like it’s really snowing. 

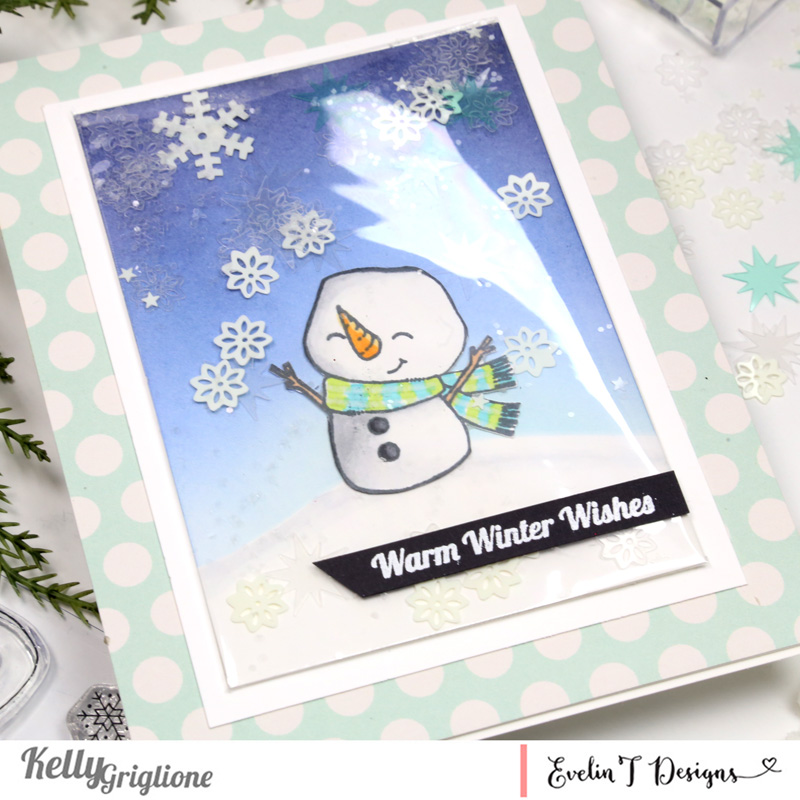
I’ve only used the snowman here, but the Good Tidings to You set has five other adorable illustrations. Evelin always draws the cutest critters ever! I just want to give this guy a big hug!
Thanks so much for stopping by!
Kelly Griglione
Posted on Leave a comment

Christmas Fun…

Happy Hello Evelin T. Designs friends. Annette Allen here with you today and I am sharing a card I created using Warm Winter Wishes, All is Calm and Good Tidings to You stamp sets. Today I am mixing up all these fun stamps and they go so perfectly together. 

I colored these sweet images with Copic Sketch makers. The background was created using Ranger Oxide inks. But first I die cut a fun Christmas tree on masking tape. I wanted the tree to be bright in the background. 
I sprinkled a little green ink and water just on the tree and on the entire card I used Copic opaque. 

Some of the images I gave dimension and the rest I just glued directly onto my card base. Finishing up with stamping the sentiment. 
Another simple but fun card to create. yay for cute images… right?
Thanks for stopping by.
Happy Evelin T. Designs crafting!

Posted on Leave a comment

Season Greetings…

Welcome Evelin T. Designs friends… Annette Allen here with you today. I created a snow filled card for you today and I created it using Evelin T. Designs: Warm Winter Wishes, Fun In The Snow and Good Tidings to You stamp sets. 
All of these sets mix so well together. That is why you need them ALL. 

I created a Ranger Alcohol ink background. You might say that does not look like alcohol ink well it is I just used water with it to get this softer look. Takes a while to dry but so worth it. 
The images are colored with Copic Sketch markers and I fussy cut around them. If you look closely I used a star embossing folder. 

I used some of the fake snow that you can find at most craft stores. These little critters are having fun in the snow. It really does not shake like a shaker card but the snow is staying right where I want it too. Yay for Christmas/Winter cards… Right?
Thanks for stopping by.
Have a great day!
Posted on 1 Comment

Warm Winter Wishes

Today I’m sharing a sweet holiday card featuring the Warm Winter Wishes stamp set. It was hard to pick which images I wanted to work with since they’re all so cute! Since I’m a big coffee/tea lover, I decided to colour the three cuties holding mugs.

I decided on a colour theme to highlight their scarves and mittens. Then I watercoloured each image strategically so they would look great sitting in a row with their winter accessories, enjoying their beverages.

To create an interesting background and to highlight these adorable images, I used two different dies to create a border with wonky scallops and stitching. Then I used the colours I used on the accessories to sponge the edges before stamping the sentiment.

I adhered fun foam to the back of the panels and used foam tape to attach the animals. To finish, I added a little white silk bow to the bunny’s ear.

Be sure to visit my blog for a full supply list. Thanks so much for stopping by!