Hey, it’s Amy and I’m super excited to share a couple of cards that I made with the Coffee Art set.
These cards are super tiny, 2.75 x 4.25. I wanted them to be smaller to be able to let the design really take over.
Are you team coffee or tea? I’m both. I wanted to use that tea bag image so I just die cut a super old to go cup and embellished it with the stamp.
Did you know that there is such a thing as Coffee Singles packaged like a tea bag? I picked up some and will tuck in the card and send one each to each of my kids.
That’s it for me, I hope you have an amazing week!
Hello Evelin T Friends! I am still a non-essential employee and hoping work will be back soon. But I feel like even though we are having to stay home, I feel like I’m maybe trying to go through the checklist of to-do’s to make everything feel more normal. So the other day I went and sat outside by myself and had some quiet time, and then came inside to do some journaling. Even though I love Bible journaling, I tend to do more of it in devotionals like this one from Illustrated Faith.
I started by adding one of the leafy images from the Fun in the Snow stamp set all around in different directions using Staz-On ink, then I continued to add more from that stamp set as well as Coffee Art and Good Tidings to You.
For the stamping of ‘choose,’ I trimmed the ‘choose coffee’ sentiment from the Coffee Art stamp set to be able to create repetitive stamping. This is more like art journaling as well, so it is playtime I needed plus quiet time. I started playing with that heart swirl latte image from Coffee Art to give it a completely different look. After the stamping was done, I added watercolors to the images and to the area to handwrite journaling. Then I finished this off with adding stickers and die cuts.
Hope everyone is well and hopefully this inspires you to also have some quiet, creative time for yourself.
Hello Evelin T Design Friends. I truly hope everyone is well during this time. I hope creating cards, or just stamping and coloring is good therapy for you right now! This difficult time we are going through reminds me of the difficult time of going through the aftermath of Hurricane Katrina. That time period pushed me into my love of being crafty where my creative journey began. So the difference from that circumstance to this one is I want to document it creatively, even though I do have to push myself to take photos 😉 This time has pushed me to go back to my Memory Planner love. I will admit I gave it up because I could not keep up, but I realize how important it is to do. Today, I’m using the Coffee Art stamp set to document the first week at home.
I first start by adding photos for each day, trimming cards and adding journaling, and then adding stamping. In this case, I wanted to emphasize the coffee cups from the stamp set. To me it really means home and even more so since coffee really helps to relax me and need it right now!
I didn’t add any coloring to the stamped images. I wanted to create a clean look to the spread and add embellishments to them. One way I used the coffee cups the most was to do a partial stamping in the rectangles for the day. Then for the sentiments from the stamp set, I added them to the rectangles and die cuts.
The ‘Hallo There!’ and ‘Smile’ are perfect for these spots above, and the leaf image from the set, frames the rectangle and the circle chipboard.
Once my days were filled in, I go back go the first page and add more journaling and stamping (kind of like my title). Along with my die cuts and stamping the month, I added another coffee cup image from the stamp set and filled it with hearts!
Thank you for stopping by and prayers for health for everyone!
Hey you! It’s Amy here with a card trio that came together super quick. Here’s a peek at the set:
I spotted THIS sketch and decided I should use some of the paper pads that I recently purchased to make a quick card set. The main images I used are from the Coffee Art set. What makes things easier for me is to keep the same overall color palette in all of the cards that I am creating.
It goes without saying that using the same card design makes it super easy too! Less of a thought process. I cut 4 panels from one paper pad and mixed and matched the patterns. This sentiment, Wishing You’re Here, is from the Sneaky Kitties set. With our state in Stay Home mode until at least May 4th, I’ll be sending this one to my girl. I miss her and she loves plants and coffee.
This card with the green foliage strip has a sentiment from the same set as the coffee cup, Coffee Art.
In an effort to make my designs postal friendly, there is no foam adhesive. Oh boy, that’s a challenge for me. Those ‘enamel dots’ are actually called ‘puffy dots’ and are squishy as opposed to the traditional enamel dots.
This is my final design. I’m a sucker for gingham. This sentiment is from the Evergreen Foliage set.
Hello Everyone! So excited to back again to share a project with you that actually combines creativity with a necessity…well maybe not a necessity. Being a memory keeper, I love to put the Starbuck’s gift cards within my memory keeping. Unfortunately, that does not always happen…oops! As I was cleaning up recently, I came across all of these cards. I couldn’t throw them out! My original idea was a mini album, but then I remembered this old Heidi Swapp Rolodex…PERFECT!
So combining some creativity with my stash and the Coffee Art stamp set, I started decorating pages to insert into the rolodex. For the Starbuck’s cards, I made sure they were all uploaded to my app, and then added them to some of the cards. I have a punch and a die cut to fit the rolodex, but neither would be strong enough to go through the plastic cards, but if you do, that would be great!
Some of my cards are small like this Greatest Mom and the hearts, so really do love them adhered directly to a card. For the images, I have several colored mostly on white cardstock using the Faber-Castell Polychromos pencils. And that little blue banner, I embossed the coffee beans in white and stamped the sentiment in black.
Once I started to get into a routine, I found different ways to add images or sentiments to each card. I used the leaf image with the bunny…so cute!
On this one card with all of the heart cards, I didn’t add stamping. I wasn’t sure how I wanted to add them, but since I had so many from previous years, I added three to a card and just added enamel dots around them. For the newest heart from this year, I added a stamped coffee cup with the tea bag that I masked and colored with the Polychromos pencils. Even though I usually get coffee with these cards, I am a huge tea lover as well!
I really didn’t have too many cards, but something I may do as they build is create a divider for the seasons. For now they blend… Such a fun creative outlet. I added fussy cutting, a die cut heart, and another colored cup with a masked tea bag to the back of this clear card.
I think this might be one of my favorites combing a gift card and the stamping! I adhered the card to pattern paper, added the stamped sentiments, and foam adhered the hot cup of coffee or hot chocolate that I stamped onto grey cardstock and colored with the Polychromos pencils…so fun!
These last two cards don’t have as much stamping, but the sentiments are perfect on each one!
Love how this came out and excited to see it build! Hope this gives you an idea of what to do with your gift cards using the Coffee Art stamp set!!
I created a colorful background using Altenew: Classy Stripes stencil and Amy Tangerine Actetate. I used Ranger Oxide inks: Spun Sugar, Scattered Straw, Tumbled Glass and Shaded Lilac. This fun image is colored with Copic sketch markers. I used some silver glitter paper to give it a little shine.
I used Scotch foam tape to give the image some dimension. I always like my cards to have a little pop. Foam tape is just fun…. don’t you think?
The background was created using the same stencil and Ranger Oxide inks: Peacock Feathers, Cracked Pistachio Picked Raspberry and Tumbled Glass. I went with a simple background but really oh so fun. I love stripes and well with all this color it is right up my alley.
The images are all colored with Copic Sketch markers and added to the card using Scotch foam adhesives. More dimension….
You can get all these fun stamp sets on the Evelin T. Designs store right HERE, plus much much more. AND more to come.
Thanks for stopping by today. Have a fantastic week!
Hello Everyone!! I’m so excited to be a part of the Evelin T Designs team sharing my first project with you today using the Good Tidings to You and Coffee Art stamp sets. To introduce myself to everyone, I have been scrapbooking since about 2007. My main focus is on memory keeping and scrapbooking, but since 2007, I have always been creative with cards and all papercrafting. I will be sharing some of my memory keeping here using Evelin’s stamps, but for today, I have some Chinese New Year envelopes to share!
I started by stamping and heat embossing onto my envelopes (cut from Silhouette) using the leaf design from the Coffee Art stamp set. As I created the envelopes, I kept the theme, Chinese New Year, in mind as far as bright colors and bringing in shine with the embossing. The repetitive pattern of the embossed leaf also created both texture and pattern with that beautiful shine. I used a soft rose gold embossing powder. As I stamped the leaf design, I rotated it alternating that pattern all the way down each row.
For my focal point of my envelope, I used the cute little mouse from the Good Tidings stamp set! He actually inspired these envelopes! Keeping with the shine from the heat embossing, I embossed him in gold on red cardstock. Then I foam adhered him to the center of another die cut piece of cardstock.
I created two envelopes in the hot pink and one in lavender, using the alternating colors for the die cuts in the center. My daughter chose the lavender envelope.
I will fill these long envelopes with a rat bookmark I crocheted. The year of the rat is my daughter’s year and is also ten years since we became a Chinese Adoptive Family. So wanted something fun she could keep and perfect with her Warriors books about cats! Will also fill hers with a gift card or money and a Starbucks gift card. Starbucks usually has gift cards to celebrate for the CNY.
Thank you so much for letting me share my first project here with you! Don’t put those holiday themed stamps away, they can be used all year long!
Hello and Happy Monday! I might be waking up to a winter wonderland this morning! I thought I should design a project that will keep things cozy. I’m featuring the Coffee Art set:
I went with a pink + green color palette. Who can resist a shaker card?
A super fun way to celebrate a special person’s birthday. I’ll slip in a Starbucks gift card.
Thanks so much for stopping by. I hope you have a great week!
Happy Friday, everyone! It’s Evelin here today with a very special post. We are super excited to join the Fall/Winter Coffee Lovers Blog Hop. Evelin T Designs is also proud to be a Super Sponsor for this Hop. You can link up your newly created coffee, tea and or cocoa projects for a chance to win many prizes, including a $25 Gift Certificate from us! This Hop will run from Friday, Nov 1st – Friday, Nov 8th. Make sure to stop by the Coffee Loving Cardmakers Blog to find out all the details on how to win prizes.
Here is the card that I created for this Hop. I used the 3 little critters from our Warm Winter Wishes stamp set and did the no line coloring technique on them. I am kind of enjoying doing no line coloring currently. I like how it produces a softer image after I am done coloring as compared to stamping the image with black ink 🙂 I also have a short process video of how this card came to be and you can watch it HERE on our YouTube channel. In the video, I shared about the paper I used to stamp for no line coloring and how I like it. I hope that you like this card that I made for this Hop and enjoyed the video as well.
This is the stamp set used to create this Shaker and No Line Coloring card:
Hello Everyone! So thankful to be here with you all and especially my talented friend, Evelin! I’ve met Evelin in California at the CHA shows and have been on teams with her before. I always knew she would succeed with her amazing talent! My main love is memory keeping, but I do love to make cards and do mixed media. I dabble in a little of everything. But before I actually make anything, I really enjoy tinkering and playing with product and then see where the creativity goes. So for today’s post, I will share some of that tinkering with a Traveler’s Notebook I created inspired by the products.
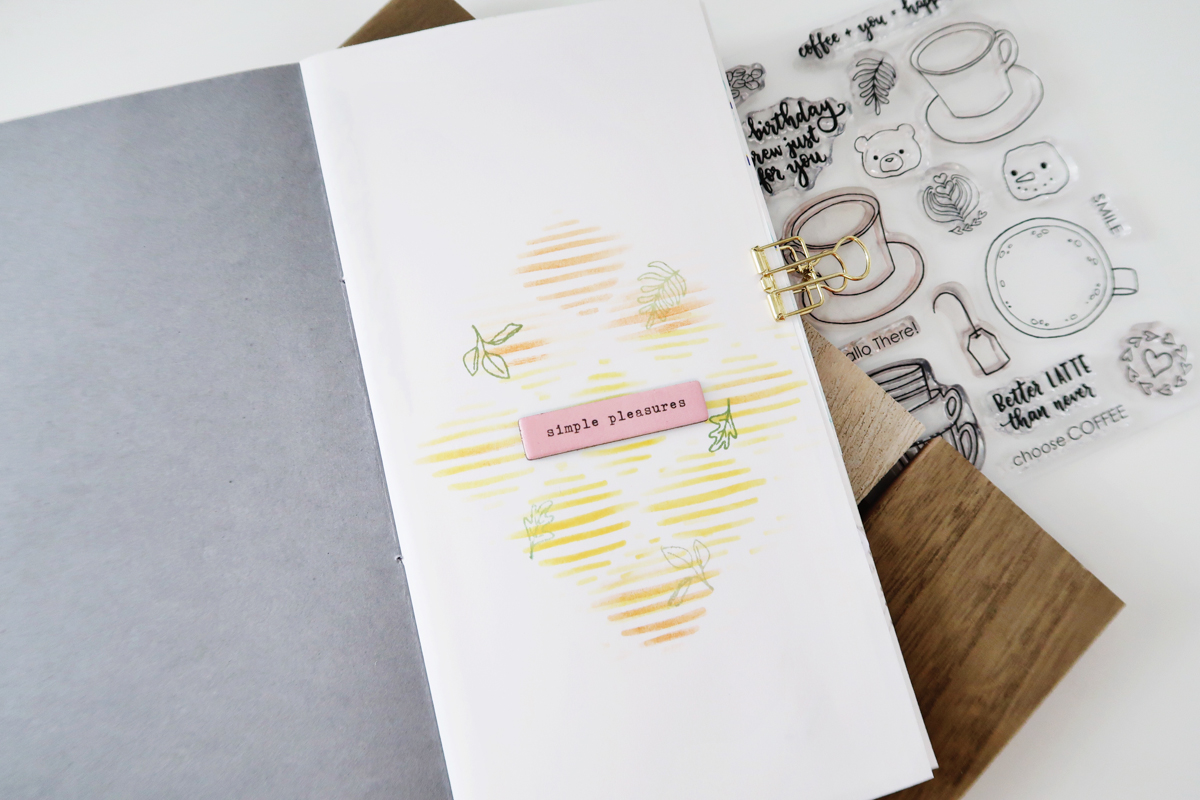
The Coffee Art stamp set really had me inspired to create this Traveler’s Notebook to document small happy moments. I started by measuring, trimming and then stamping some of the images using black ink onto grey cardstock. For the inside pages I used a Strathmore Sketch Paper Pad. The reason for this paper, is I wanted the pages to be thin. I can then either create on top of the pages, or my favorite is to work off the page, and then adhere my creation on top. Will share more of that in a bit. I also have a video showing how the inside pages came together, you can find at the end of this post.
For my first inside page, I wanted something there but very simple. So I used a stencil and inks to create a blended ombre look, then stamped some of the leaf images from All Hallow’s Cuteness and Coffee Art in shades of green ink. I finished it with a chipboard piece in the center.
Now for my first full page spread in my album, I was inspired by the Coffee Art stamp set again to use with this photo, which happens to have a coffee cup 😉
Because my inside pages are thin, I could see the ink from the first inside page showing through. To Fix this, I either adhere two pages together, but in this case, I wanted to work off-the page first and then adhere to the TN page. I first started by stamping the leaves from the All Hallow’s Cuteness stamp set, then used a ruler to draw lines. I used this to type my journaling.
I stamped and colored a good bit before creating this project. The little toadstools I stamped and watercolored from the All Hallow’s Cuteness were the perfect touch to this woodsy, whimsical memory. To add a little more texture, I used a light green ink to stamp the circle heart image from the Coffee Art stamp set. I finished that page with washi tape, die cuts and puffy stickers.
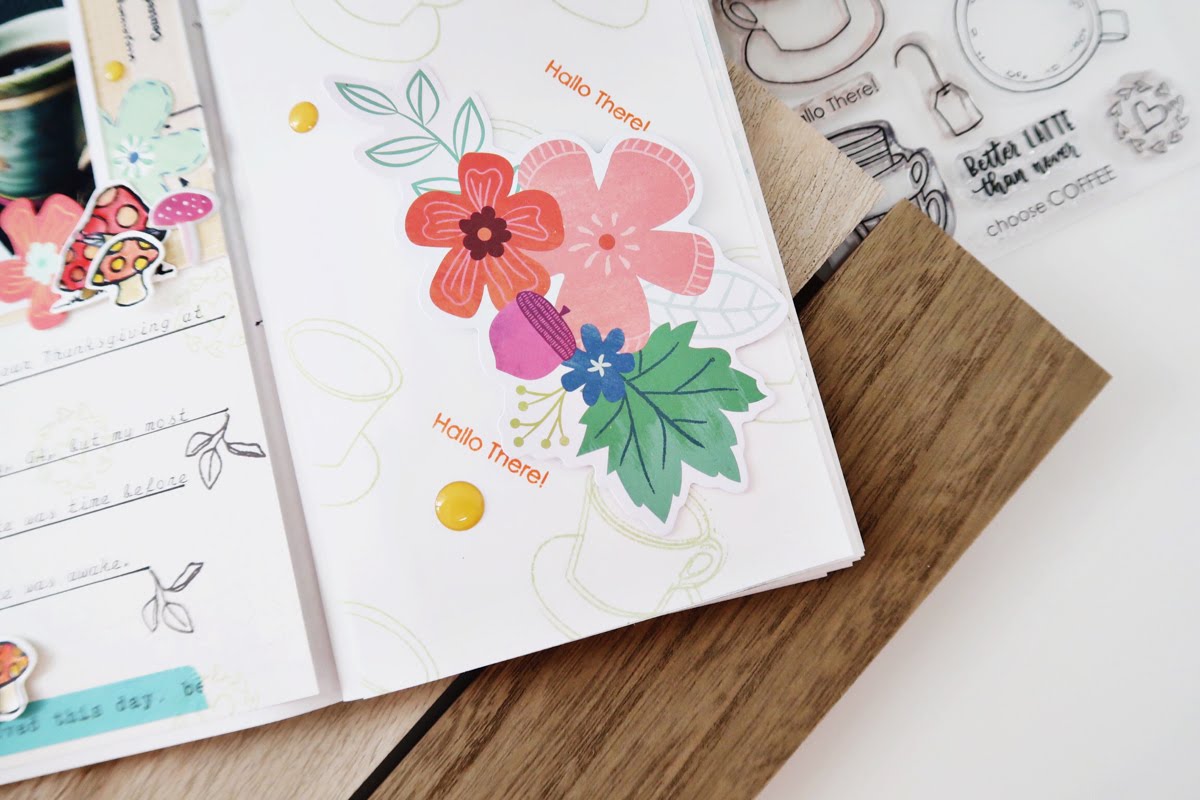
For the right side, I wanted to show more of the cup images, so I created a repetitive pattern on a separate piece of the same paper. Then stamped in the ‘Hallo There!’ sentiment from the same stamp set. I am choosing the green and the orange inks to complement my photo, the colored images and die cuts I used on the left.
I finished this side with another die cut which covered up an imperfect stamped image I did (oops), and then finished with enamel dots. The die cut also helps to balance with the left side. Then I adhered both of these pages onto the inside pages of my album.
The sentiment ‘coffee + you = happiness’ inspired me to document me and my daughter at Starbucks with her new phone, taking and sharing her first selfie photo for my next spread in my TN album. I also kind of love the bear and the snowman marshmallow images from the Coffee Art stamp set. The bear went perfectly with my daughter’s fuzzy headband too 😉
I worked directly on the pages of the album to ink a starburst that repeats the image in the top left from the photo. I wanted the sentiment to be the focal in between the stamped images.
I typed and then detail cut and stitched labels together to add my journaling.
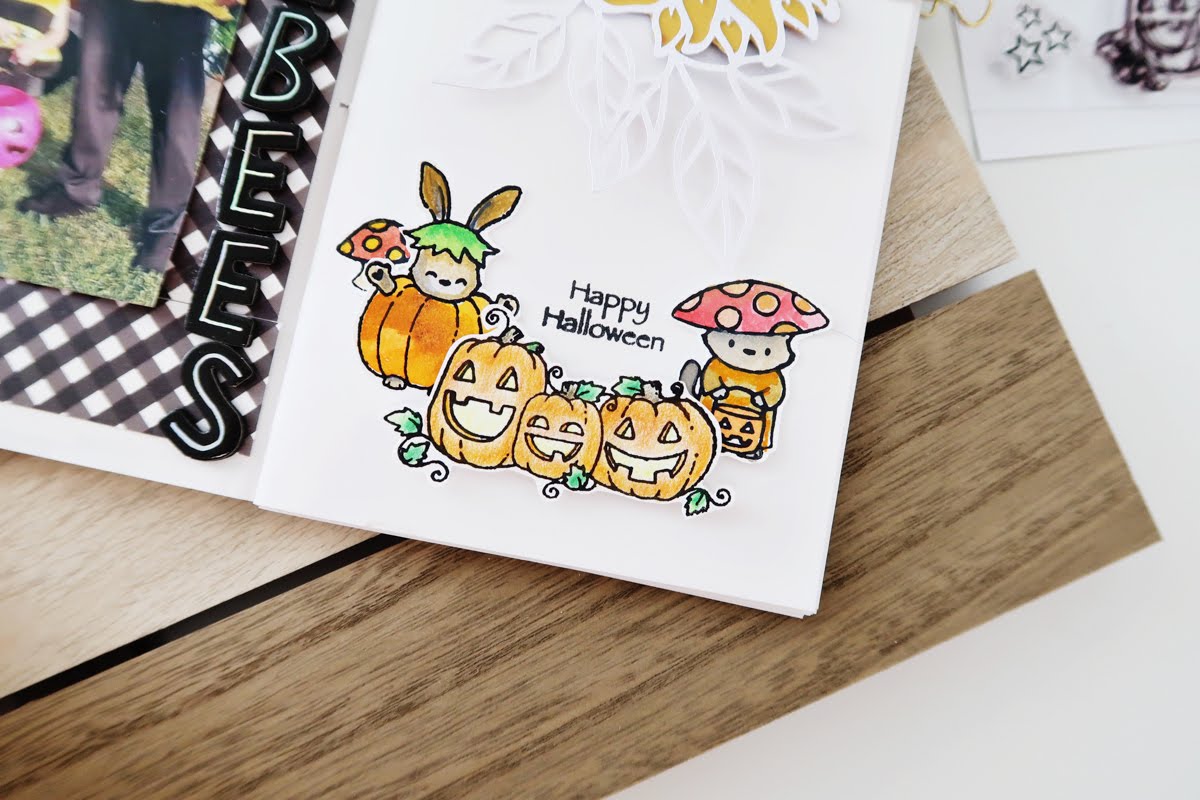
For my last page to share today in this Traveler’s Notebook, I created a Halloween page. I had lots of the Halloween images stamped and colored as well. I used a cut file from Citrus Twist Kits that went perfectly with my photo but also great little spots for those adorable, little images from the It’s Boo-Tastic! and All Hallow’s Cuteness stamp sets.
All of the images here were colored with watercolors, except the three jack-o-lanterns. I love how well the mixed together to create a fun cluster with the stamped ‘Happy Halloween’ right in between them.
I used foam alpha stickers and enamel dots to finish this spread.
I did not have a plan for each one of these pages. But I love how the inspiration comes as you stamp and color. Hope this inspires you to try your stamped images in your memory keeping or gives you some ideas for your next card! I will be back in November to share cards as a guest again here with Evelin T Designs!
I do have a video showing how these pages came together. You can watch it in HD on my YouTube Channel here or below. Thank you so much for letting me share and guest!


 Coffee Art$16.00