Posted on 2 Comments

Make the Jump

Hello! Heather here with a fun little scene created using the adorable Take a Leap of Faith stamp set!

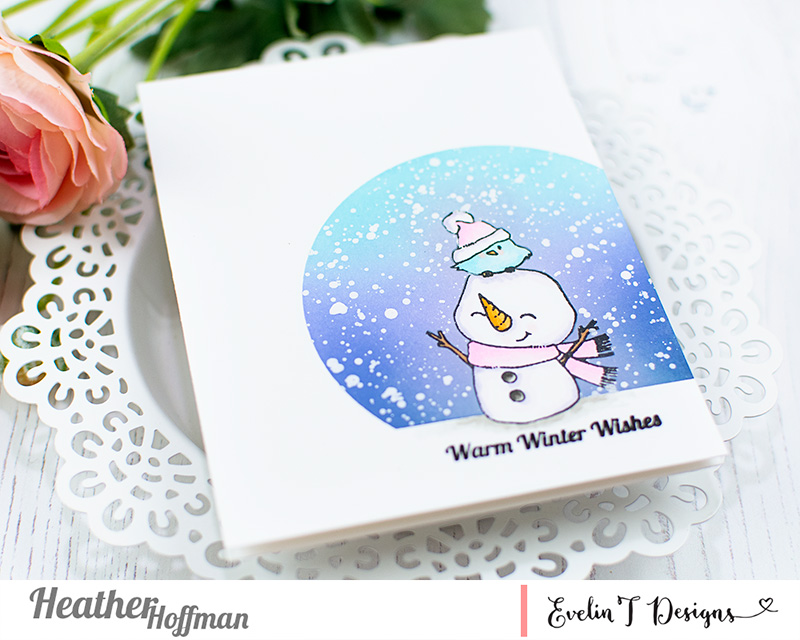
I started off with a panel of white cardstock, and stamped all the images around it – making sure to stamp the clouds off the edge of the paper to make it feel like the scene continued on past the panel.

I did some very simple Copic coloring on the images – keeping the colors nice and light and bright. I also added the look of a touch of grass at the bottom with the markers.

Once I had the image colored in, I added a layer of white cardstock underneath in a thin frame – just to keep it separated from the busy pattern paper underneath. Then I mounted it with foam adhesive over that happy plaid pattern paper!

Thanks so much for coming by today – have a wonderful day!

Posted on 1 Comment

I think you are PAWsome – Sneaky Kitties and Colored Pencils

Hello! Heather Hoffman here this morning with a card using the adorable Sneaky Kitties stamp set – this is a super fun image to sit and color, and while I had done it before with Copic markers, I decided to try it with colored pencils for today’s card!

I hadn’t used my Polychromos colored pencils in quite a while, and thought it would be a great opportunity to break them out and do a bit of coloring. So relaxing and fun to play with coloring sometimes! I stamped the images in a deep brown ink on some rustic cardstock before coloring.

I also love tucking parts of larger images behind windows – I love how it changes the entire feel of the image. And those little sneaky kitties are super cute!

I combined a die from Avery Elle and from Mama Elephant to create the layers in two shades of green, then mounted on a cardbase created from that same rustic cardstock the images are stamped on, and added the sentiment at the top of the window – super happy that it fit in there just right!

Thanks so much for stopping by today! Have a wonderful day!!!

Posted on 2 Comments

Rustic Coffee, You, and Happiness

Hello! Heather Hoffman here this morning with a card a fun card to share with you using the adorable Coffee Loving Critters stamp set. Do you ever just have some pattern paper you want to create something with, and base a card around that? That is pretty much what happened for this card!

I had this adorable Echo Park Little Lumber Jack 6×6 paper pad, so I pulled out a few of the coordinating papers to layer up. I die cut a rectangle, and then a heart window in the center of it using a couple of Simon Says Stamp dies, then layered it over some of the woodgrain paper

Next, I stamped those adorable mugs from the Coffee Loving Critters stamp set, colored in the “coffee” on the inside, and paper pieced the cups with some of the pattern paper in the pad, adding a bit of shading and depth with a Copic marker. I also added a layer of Glossy Accents to the coffee in the cups to add some shine.

I layered those with foam adhesive over the heart, and then stamped a sentiment on a strip of white cardstock from the same stamp set, and colored in the little heart with a Copic marker as well, then mounted that with foam adhesive under the coffee mugs.

Finished off by trimming some of the paper into strips, adding a torn edge, and attaching with small staples in a criss cross pattern.

Thanks so much for stopping by today! Have a wonderful day!!!

Posted on Leave a comment

Bird on a Snowman – Warm Winter Wishes

Hello! Heather Hoffman here this morning with a card that I had SOOO much fun making! It was one of those cards that you picture and want to try, and love so much when it comes out like you were picturing in your head – so great when that happens! I combined two different stamp sets – Good Tidings to You and Warm Winter Wishes to create this little one layer scene!
As I was looking at my stamp sets, it occurred to me that the little birdie from Warm Winter Wishes would look super cute on the snowman from Good Tidings to You – so I did a bit of masking to add the birdie on the snowman.

Since I was already in the mode of masking by now, I went ahead and added a mask over both images, a circle mask around the entire scene, masked off a line along the bottom, then did some ink blending, finishing off with lots of white paint splatters for snow.

I let the paint dry, then stamped my sentiment along the bottom and added a bit of coloring with my Copic markers. One particularly fun touch is the bit of shadow added under the snowman with Warm Gray markers – I love how it makes the scene feel like it is a little more dimensional even with only one layer!

Thanks so much for stopping by today! Have a wonderful day!!!
Posted on 3 Comments

Critter Window Card

Hello! Heather Hoffman here this morning to share a card using the adorable new Good Tidings to You stamp set – one from the new release that I hadn’t had a chance to play with yet…and it is SOOO CA-UTE!!!

I thought it would be fun to create some windows and have some of the cute images peeking through from the windows. I die cut 3 different size windows with a basic circle die from a panel of white cardstock, then lined up and stamped 3 of the cute images from the set behind the windows on a white cardbase.

I then had fun coloring in all those sweet critters, then added some sparkly Nuvo glitter drops on all the red parts of the image – I love the shine and sparkle that adds!

Once that dried, I stamped my sentiment on the front window panel, then adhered that with foam adhesive on the card – this gives it a bit of dimension which is fun with the windows.

Finally, for just a bit more sparkle, I added some coordinating green jewels sprinkled around on the card!

Thanks so much for stopping by today! Have a wonderful day!!!

Posted on 2 Comments

All is Calm…and Rainbow!

Hello! Heather Hoffman here this morning playing with some of the adorable holiday release – SOOO much cuteness to have create with! I had a blast using the darling All is Calm stamp set to create this fun and colorful card – I love mixing up and using fun and different color combinations for holiday cards, and I love how unexpected this color combo is!

Sample card by Designer Heather Hoffman

I started off by heat embossing the image in white on white cardstock, then blended a rainbow of distress inks over the top to create an emboss resist, showing off the image underneath!

Sample card by Designer Heather Hoffman

I heat embossed a sentiment from the set in white on black cardstock banner, then popped that up on foam adhesive on one side.

Sample card by Designer Heather Hoffman

Finished off by matting the front panel with black cardstock, then mounted on a soft blue cardbase.

Sample card by Designer Heather Hoffman

Thanks so much for stopping by today! Have a wonderful day!!!